
Myself and Mike got to play our next game in our Operation Martlet campaign, our last game was more then 6 months ago and for the British (me), it was do or die. This was turn 8 and I was trying to capture table 4: Striking at Saint Nicholas.

 |
The campaign is 11 turns and to win they would have had to capture table 6 by the end of this turn so an impossibility. If the Germans hold Table 4 it is a major German victory, it was felt if the Brits could not move on in this turn they would resign the campaign as there was no way they could win.
This had been a long and difficult slog for the British, the first 3 turns got messed up because we misinterpreted the German OB and they had 30 troops rather than 20 in their core platoon. It took the Brits 4 turns to get off Table 1! This was followed by a back and forth with alternate British-German victories, but without the Germans suffering any attrition as each British victory was achieved by the Germans withdrawing without significant loss. By Turn 8, the German morale was quite high with a +4 on Force Morale rolls, while the Brits had a -1. Chain of Command is all about Force Morale and to win one has to diminish one's opponents FM.
I was quite positive though going into the game and felt I could win and try to achieve a draw in the campaign. From looking at the above table it appeared to me that the Germans would end up in a highly fortified position and really success could only be achieved by HE bombardment. I set up a nice terrain for our game.
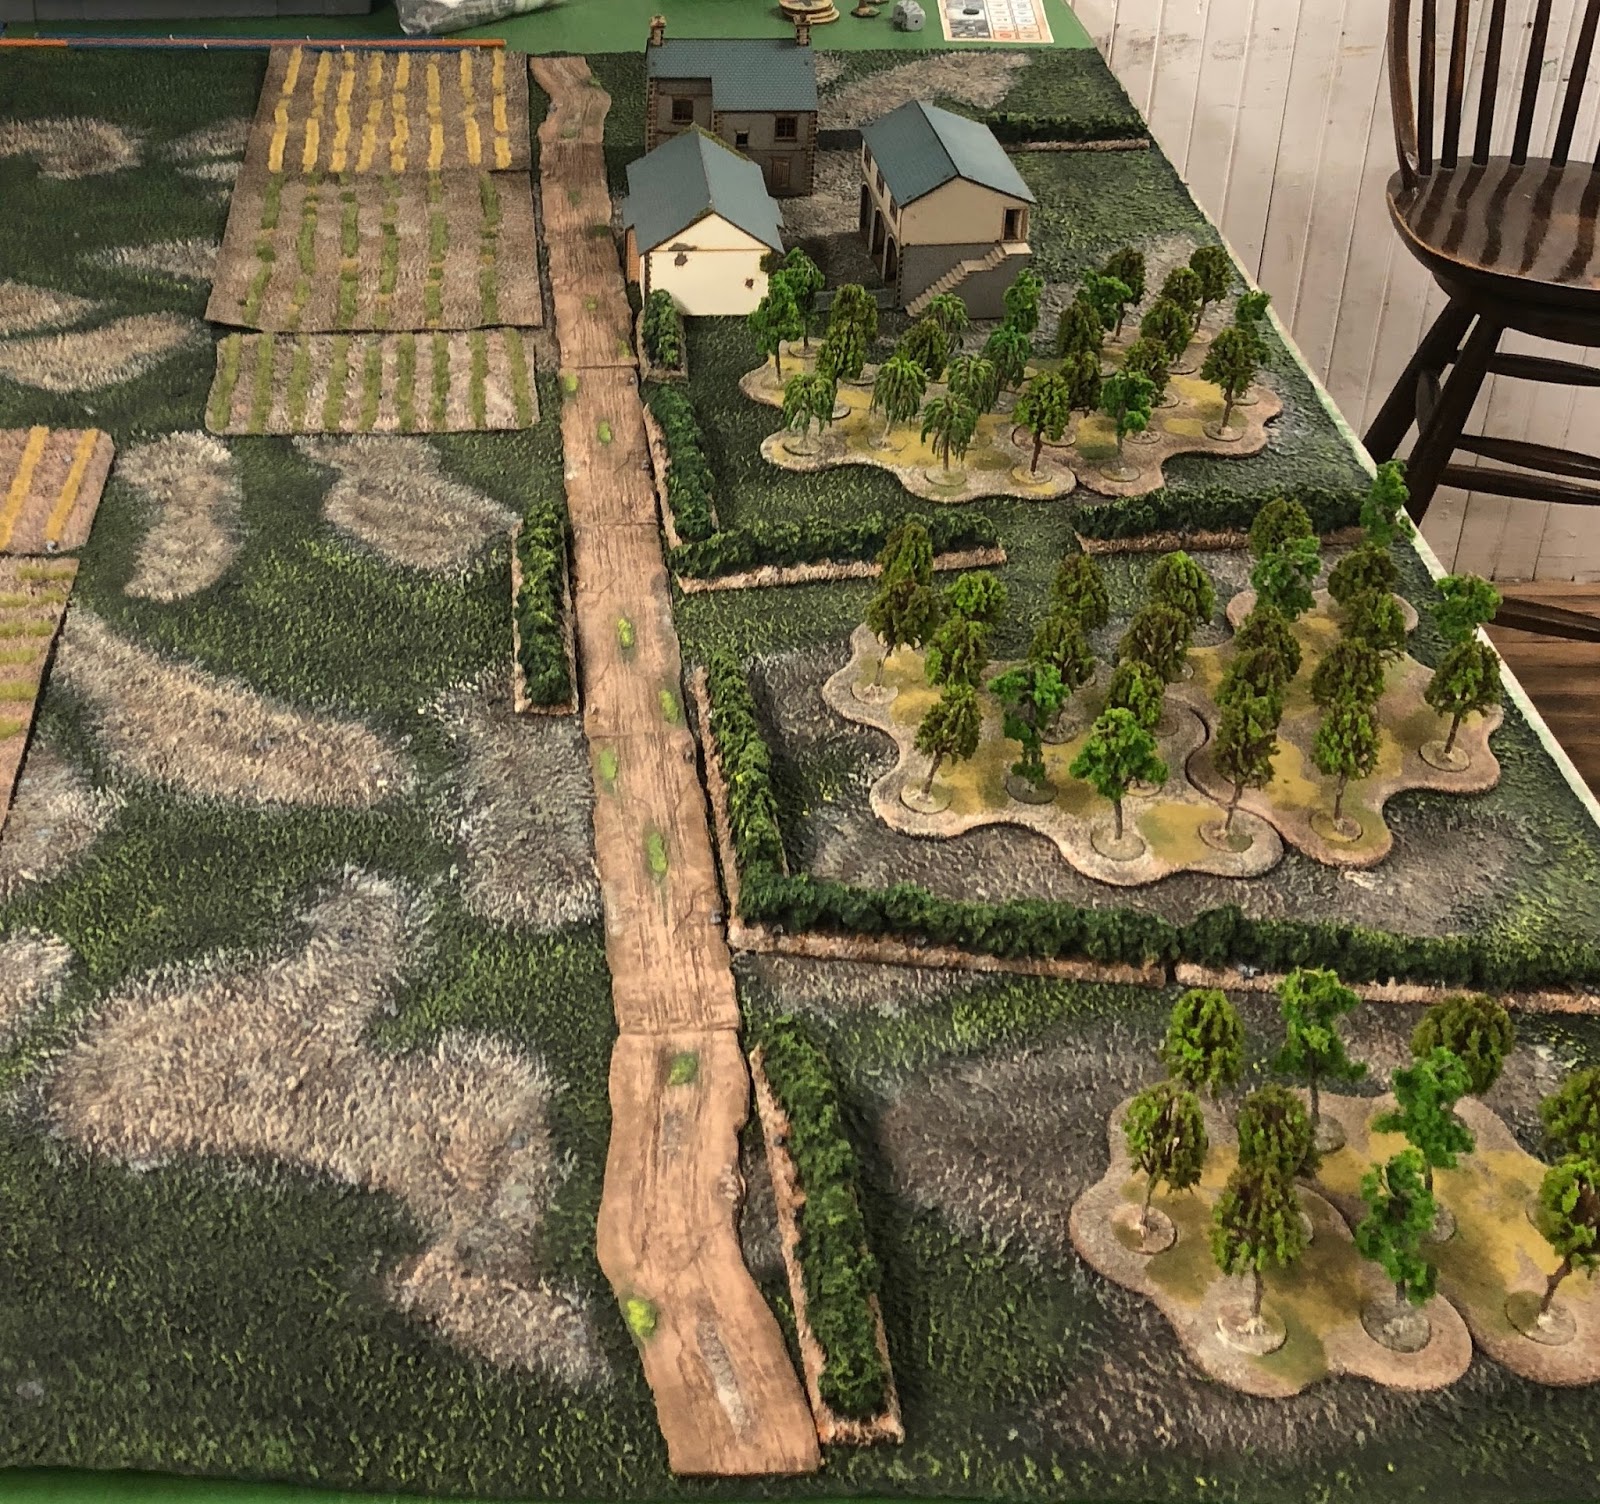 |
| British start position |
 |
| British JOP's in blue. I am not really sure what I was thinking about the flank JOP in the foreground. |
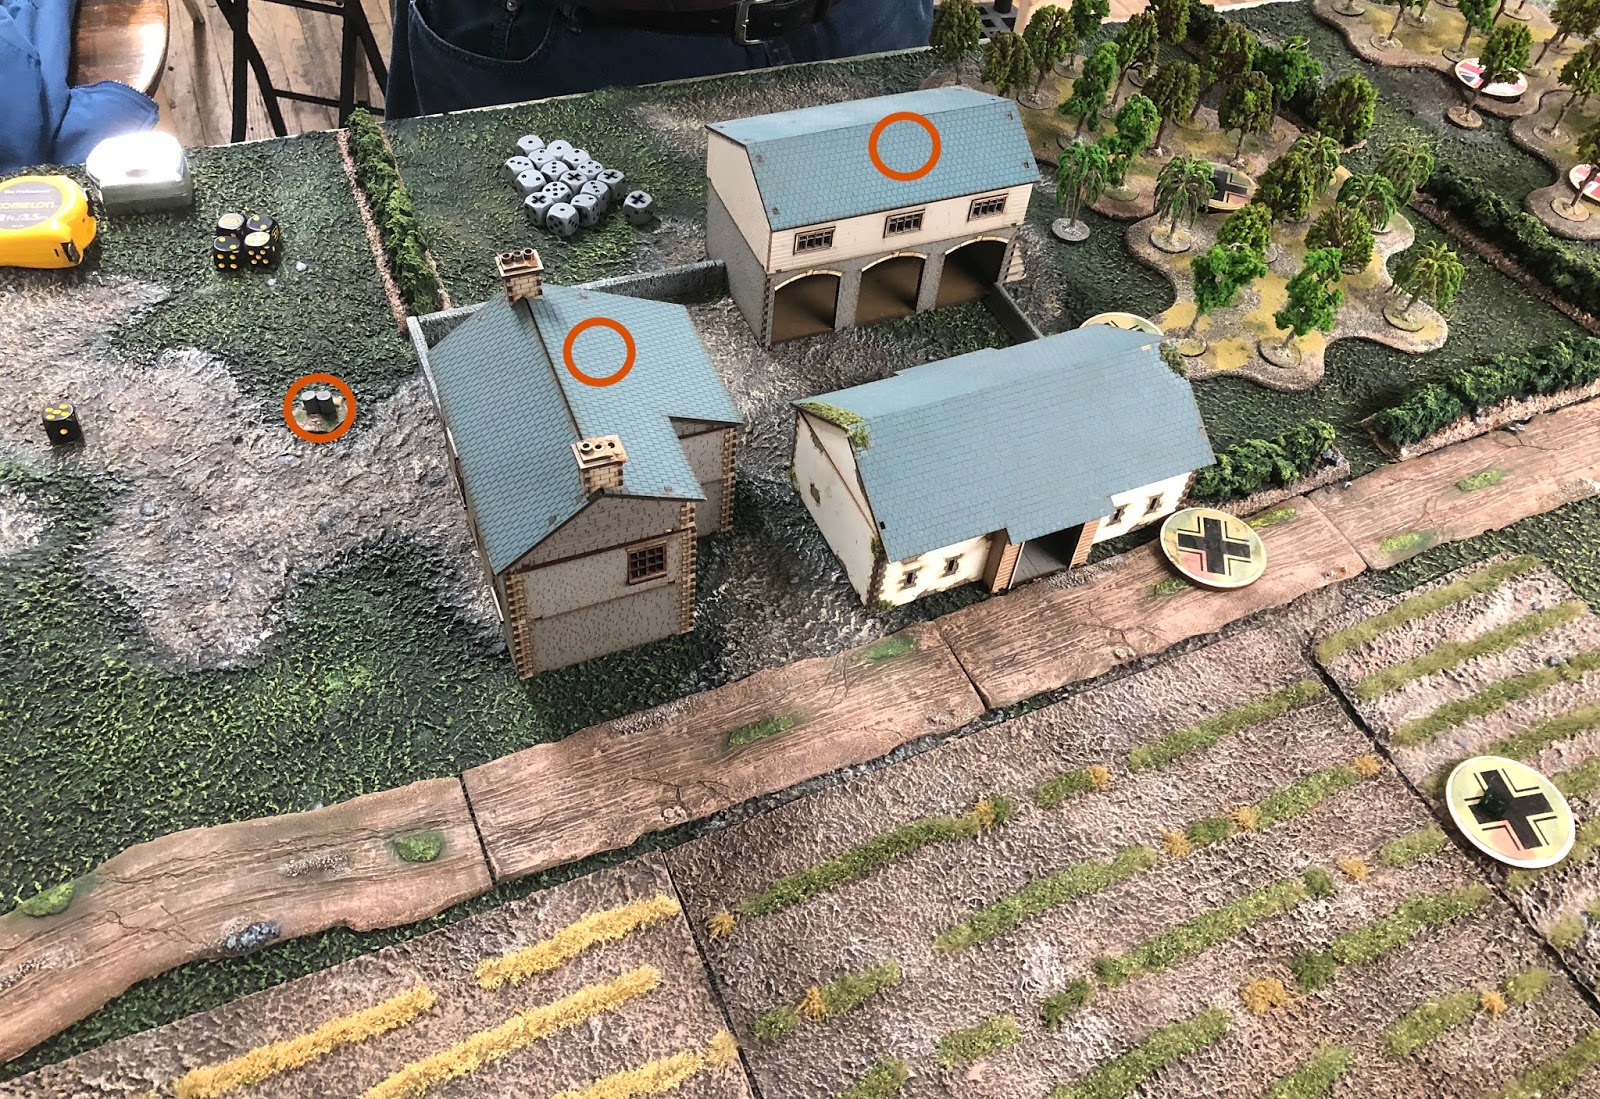 |
| German JOP's as expected. I left the patrol markers on for the photo. |
Starting Forces
British (21 Support Points)
Starting FM 8
Core Platoon w/ 2" Mortar and Piat Teams
Churchill AVRE
Sherman
2 extra Piat Teams
Forward Observer
Germans (12 Support Points)
Starting FM 11
Core Platoon w/ PanzerIV
extra PanzerIV
Forward Observer
Adjudant
My game plan was to get the AVRE and FO on the table as soon as possible so I would be in good position once Mike started to place his troops in the 3 stone buildings. I also had to get an least 2 sections on to protect the FO and any Piat Teams that I had to position in order to take out the German Tanks. I really was hoping to accumulate CoC dice as well as I was pretty confident that Mike would take a FO. Having the ability to continue and end barrages is a big part of the game.
It actually went pretty well although early on in the game I had a lot of double phases which are sometimes not that helpful. I even threw 4d6 once and we had to dice on the Random Events table. It is nice to have double phases but if you do not get 1's and 3's it is hard to move things around.
I will not go into the whole game and in the heat of the action, I took few photos. It was actually the first game where I killed more troops then had killed. The high point of the game was collapsing a building with a full German squad and killing the FO. Despite this I just could not get the German FM down while mine went down rather quickly. Mike had a lot of excellent dicing to save hits and on the FM table. I use the photos below to explain some of the result.
 |
| These 2 PzIV's were my bane, Mike did a great job of playing them to take down my armour and once this was done to rain HE and HMG fire on my troops. I did get a few shots at them but Piat's and Shermans are just not that good for taking out the well armoured PzIV. You can see that after the house collapsed Mike withdrew all his troops to behind the building out of range of my mostly intact sections. |
 |
| On the other end I just could not generate good armour saves and my AVRE and Sherman were taken out by the 2 PzIV's. Mike mentioned that maybe if I brought both them on at the same time it might have been helpful as he would have to split his fire. I can only agree as I never brought on the Sherman until just before the AVRE was destroyed. |
 |
| Despite having minimal core platoon loses and still having a section and 2 Piat Teams to bring on, the loss of several Support Teams plunged my FM to zero......game over. |
Final Butcher's Tally:
Germans
Ending FM 10
6 riflemen
Supports
1 FO
British
Ending FM 0
JL
3 Riflemen
Supports
2"Mortar Team
AVRE
Sherman
I actually felt this was the best game I played in the campaign, I had a pretty good plan which might of worked but Mike's excellent tactics and dicing caused the game to go otherwise. I was a little disappointed not to win, but there is always another campaign!
Enjoyed reading that John, and the table layout looked great. Those Panzer IV's are hard to knock out!
ReplyDeleteI enjoyed reading your campaign account. From other AARs I've read on gaming Martlet, the Saint Nicholas scenario is a really tough one for the British to win.
ReplyDeleteExcellent write up.
ReplyDeleteGreat write-up - and what a cool table!
ReplyDeleteDo you find there is a bit too much power in the artillery in this game? It seems really dominant to me...