Showing posts with label Bloody Bucket. Show all posts

07 November 2020

Bastogne Falls!: Bloody Bucket (7c/12)

Bit of a delay in posting this AR, I have had a very busy week. We played our 12th game in the Bloody Bucket campaign this past Monday evening. This was a Blitzkrieg from table 5 to 6 with Sturm Platoon #5. By now, they were getting pretty worn down as their Company Commander "The Butcher" has pushed them into a 2nd Blitzkrieg. They were down a full Sturm squad and the Rifle Grenadier team. Fortunately for the Americans, they were able to retreat troops from Table 3 and 5 to table 6 so they had a full platoon. 

Sturm Platoon #5
CD 5 Green FM 8
1 SL (CR reduced to 6")
1 Sturm Squad w/JL
1 LMG Squad w/JL 

Supports
Pregame Barrage
Panther w/SL
le. iG.18 (-1 crewmen)
MMG Team


American Rifle Platoon
CD 5 Regular FM 10
2 SL's w/ Bazooka Team
3 Rifle Squads w/JL

Supports (?)
2 Minefields
Entrenchment
0.5cal HMG team
Sniper
Bazooka Team

The Game


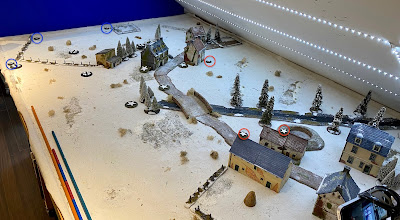
This was the 2nd time I attacked this table but this time I was coming from the east rather than from the southwest. The table orientation above is with the east being at the bottom of the photos. We diced for terrain and this time the temperature had gone up, so the ground was soft. The vehicles would have to stick to the roads to prevent the risk of bogging down and there was going to be no rapid movement except on the roads for the troops. 

The Patrol Phase with the PM's and JOP's are above. The Americans had a pretty broad defensive line covering both roads and could deploy behind the tree line in the centre unseen. There was no way I could force a Withdrawal with the limited troops I had, so I really had to rely on dropping the enemy's FM. 

I did have some advantages, P-Y had deployed his 2 minefields in the last turn on this table and where they were in the extreme Northeast corner of the table they were going to have no affect on the game. He had a well placed entrenchment on the 90 degree turn on the dirt road which I was quite confident he would place his HMG team. I was worried about his Bazooka Team and I was suspicious that he would have a 2nd Bazooka as a support and all though my Panther had been lucky to date, I felt it could not last forever. I also noticed that the 2 JOP's on my right flank were less then 12" apart, my Panther is a big tank (>4") and with careful positioning I could deny both JOPs to the Americans.

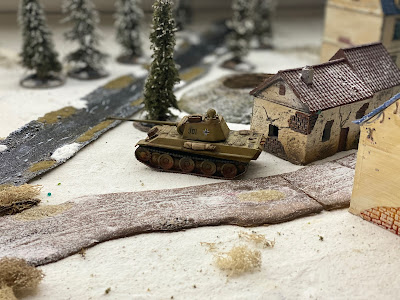
The game started with P-Y getting several double phases, and he started to deploy several units quickly denying me the opportunity to get on the table with some units on overwatch first. He then threw a quadruple 6, ending the turn; gaining a CoC dice and generating a Random Event. This time it was barrage but fortunately for all it fell on an un-occupied area of the table. So now the advantage of the Pregame Barrage was lost to me but luckily I was able to get on the table in the next phase while the Americans had no units on overwatch. I placed the Panther on the metalled road and the IG on the dirt road, this was a little tricky as they were in LOS for most of the American troops and were only in light cover until I could move them (a 4" deployment range is a great disadvantage). 
The Americans had a sniper in their HQ as well as a couple of squads behind the tree line out of LOS. 
It was not long before they came under fire from both a HMG entrenched on the road as well as the troops in the centre who now had advanced to the tree line. I was in trouble here and was forced to place my LMG squad in the open to share hits. Suddenly however, I got lucky as P-Y started to throw poorly on his "to hit" dice and I throw terrific "to save" dice. 

I took a lot of damage but was able to move everyone behind a house where they still had a good LOS to my right flank but were out of LOS for the HMG and and one infantry squad, I was now able  to advance my Panther with support from the IG. I was also able to advance a 2 man team with a JL into the large barn on my right flank half way up the table. P-Y deployed a rifle squad within combat range but before they could engage they had to undergo overwatch fire from my well positioned IG. The small team was outnumbered but were able to generate almost the same combat dice as they had STG-44's. They were all killed including the JL but the Americans lost more men in the combat as well as a JL and they came out worse on the FM tests.
P-Y continued to have very poor dice, and I was able to advance the Panther up the road. He was able to deploy 2 Bazooka's teams, they must of taken 5-6 shots in the next couple of phases but had difficulty with their "to hit" dice even though they were at close range and when they did hit, were unable to cause damage because of the Panther's superior armour.
The Panther advanced shutting down 2 JOP's for a couple of phases and then advanced into position to have LOS to the troops embedded in the tree line. It was not long before I was able to drop the American FM to zero, game over.

Bastogne fell that afternoon, a significant victory for the Germans in the campaign.

Game and Campaign Summary

I do not believe either of us found this final game a lot of fun, P-Y had extremely poor dice which really distracts from the game itself and I really did not play the best tactics in this game. I had to bludgeon my way to victory which does not always give that much satisfaction. I was happy to win as it has been a while since I won a campaign, I actually still have 2 unfinished campaigns on the books (Von Luck and Many Rivers to Cross). I suspect that these will never get done.

In respect to the campaign, this is by far the best one I have played as the players have to make an enormous number of strategic and tactical decisions. At the same time, I have never had to ask some many questions as there is a real lack of clarity in respect to the writing. Some questions have still gone unanswered. I find this a little unfortunate as it is difficult to resolve some questions in the middle of a campaign between the 2 players as the answer may favour one side over the other. An Errata/FAQ is required here.

I am not sure where we are going to do next, a little burned out with CoC, although I still am in the midst of the April 9th campaign. We are planning to play some other games in the short term but I suspect it will not be long before both myself and P-Y are battling it out in the Jungle.

29 October 2020

Consthum Village Blitzkrieg: Bloody Bucket (7b/11)


Yesterday morning we played the next game in our Bloody Bucket campaign. After taking Holzthum Village with their force intact, the Germans decided to Blitzkrieg Consthum Village, the next objective on their way to Bastogne. Both sides had full platoons.

Sturm Platoon #5
CD 5 Green FM 8
1 SL (CR reduced to 6")
3 man rifle grenadier team
2 Sturm Squads w/JL
1 LMG Squad w/JL 

Supports (22)
Pregame Barrage (2)
Panther w/SL (12)
le. iG.18 (4)
MMG Team (4)


American Rifle Platoon
CD 5 Regular FM 11
2 SL's w/ Bazooka Team
3 Rifle Squads w/JL

Supports (?)
2 Minefields
Entrenchment
0.3cal MMG team
Sniper

The Game

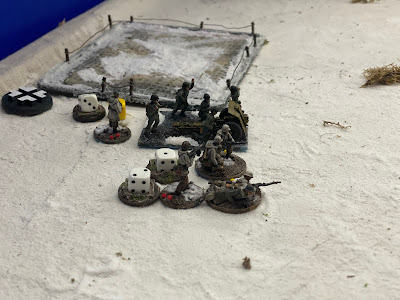
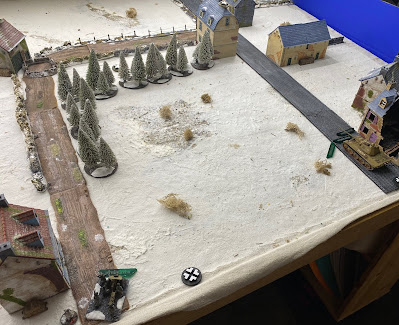
Since the German FM has been forced down to 8 because Unterfeldweld Johann is now known as "The Butcher", the Americans got to move first. They diced up 2 free moves, so they got 3 moves with their PM's before I even had a look in. You can see the result below with both the position of the PMs as well as the JOP's.
I would have liked to get a little further north and east (you are looking west in the above photo), I was also a little alarmed that the American had got a JOP so far forward but I did notice the P-Y had placed the 2 JOP's in the foreground very close together. Of course, I was attacking from the south and as there were no roads to the south I could enter anywhere on the that edge with my Panther. We had diced up the terrain conditions at the start of the game and fortunately the ground was frozen so no limitation on movement which of course favours the attacking player.

The game did not start off that well for me, as P-Y got multiple double phases and then threw a quadruple 6, getting a free CoC dice. Fortunately, the random event this time was a barrage in the northeast quadrant which affected no one this early in the game. He did place 1 platoon in the house in his forward position. I waited until I finally got a double phase when he was not on overwatch and placed my Panther to the southeast and a le.IG18 in the west with a Sturm squad. I hate placing units in the open but I really had no cover anywhere and P-Y was already well ahead of me in CoC dice. He held off using his squad in the building so I could not fire at them as I was too far away to see them. I felt it was now time to move the game along so I deployed my Rifle Grenadier team in an attempt to force the Americans to reveal themselves which they had to do as they would get overrun. I was now able to bombarding the house with 3 units; the Panther, the IG Team as well as the Sturm squad. 

P-Y was now up to 2 CoC dice while I did not have one, but I was lucky with my firing and wounded a SL he had to deploy in the house. to remove shock. He deployed a 2nd squad behind the house and started to inc them around to get in a position to fire at my units in the open. They only reason I was holding on was that I was firing three units at his one despite me being in the open and the Americans being in hard cover. By now my Rifle Grenadiers had been killed so my FM was down to 7 while P-Y's was down to 9 from 11. His SL in the house got wounded.  I felt the only way to combat this was to increase my firing pressure so I added my LMG squad plus my 2nd Sturm squad to the mix. This worked as I now had 5 units firing and I was starting to cause significant damage, P-Y moved his 2nd squad around the house and fired back at my guys in the open hitting on 4's as my troops are green and the Germans firing back hitting on 5's. I got lucky and 2 more of his his leaders were hit and his FM was down to 5. By now I had moved my Panther next to the house where he had a JOP shutting it down. He had to use a CoC dice to interrupt and move one JOP or I could have shut down both JOP's. 

Things were now looking good, the Americans were forced into a position were they really had just one useful JOP preventing them from firing from the southeast at my flank. I was able to manoeuvre the Panther into a position where it could fire at the American platoon in the open. I was able to fire all 5 units over the next couple of phases at the troops in the open, they broke, the American FM went down to 4 and the American platoon made a break move hauling a wounded SL and JL with them. But I had a CoC dice and ended the turn. Two routed leaders and a team are a lot of FM tests, the American retreated. One table to go! You will note that "The Butcher" stayed back and never deployed so he has not been shot in the back yet.

The Germans lost their 3 Rifle Grenadiers, 1 IG artilleryman, as well as 6 infantrymen. The Americans lost their sniper, their Bazooka team as well as 12 infantrymen.

In respect to the campaign I am at turn 7 still, and just realised from FB that there are no limits on the number of tables you can Blitzkrieg in one turn with one platoon. I did take some loses here, but really if I can take the last battlefield in this turn, the Germans will have a major victory in the campaign. Time to Blitzkrieg yet again. This is going to be a challenge as although the Americans lost many men on Battleground 6 in the original assault, they have been able to retreat enough men from Batllefields 5 and 3 to make a full platoon.

18 October 2020

Holzthum Village Captured- Bloody Bucket (7a/11)


Another busy week of wargaming, with the 11th game in our Bloody Bucket campaign. We are now at Turn 7, so the chances of a major German victory has passed. In this game I was attacking Table 3 (Holzthum Village) for the 3rd time. Previous attacks had been by the Flank Attack Scenario, both of course had been unsuccessful, so this time as I had some choice I felt I should go with the Attack and Defend Scenario. As previously reported I now have the sobriquet "The Butcher" from my troops so it was time to win one, before I got shot in the back!

Sturm Platoon #5
CD 5 Green FM 8
1 SL (CR reduced to 6")
3 man rifle grenadier team
2 Sturm Squads w/JL
1 LMG Squad w/JL 

Supports (27)*
Pregame Barrage (2)
Sniper
SL
Panther w/SL (12)
le. iG.18 (4)
MMG Team (4)
*should have been 22...miscounted!


American Rifle Platoon
CD 5 Regular FM 9
2 SL's w/ Bazooka Team
3 Rifle Squads w/JL

Supports (?)
2 Minefields
2 Entrenchment
0.3cal MMG team
Bofors ATG

The Game

I have laid out a few photos below from P-Y, they are always better when taken directly rather than through the internet. As noted above I decided to attack across a broad front, I felt for the first time the Patrol phase went well for me as I was able to restrict all go the American JOP's to on the road or in the houses just south of the road. At the same time I was able to place my JOP's across a very broad front, with one in the centre south and one each on the western and eastern flank (the 2nd picture below is flipped so the south is at the top of the screen). I do not like having unsupported JOP's but the Americans have been very cagey in deploying in all the games so I felt that I only opportunity to win was to force them to deployed when I had all my troops on overwatch. The Pregame Barrage is always a help here.

So I planted my Panther on my left flank, this time with a SL to increase my CI, the tank has 3 weapons. I then got the IG in position on my right flank, and because of a double phase was able to get a MMG team and a LMG squad in the middle of the table behind a hedge all on overwatch. P-Y did put down his Bofors in an entrenchment and it did get off a shot or 2, but I was able to take it out relatively easily.

I threw a quadruple 6! This was the 2nd random event in our game. The last time it was a torrential rain fall which was quite helpful to me. This time, however, one of the house got fire with rapidly spreading smoke to the southwest (5th photo). My plans were a mess. The game settled into multiple CD throws with very little action. We were both accumulating CoC dice, but nothing else was happening. I then decided to shake things up by deploying 2 scout teams, one on the right and one on my left flank. As the JOP's were well up the table, I was able to get both teams in a fairly good position. I captured the entrenchment where the Bofor's had deployed, just south of the road with my left flank advancing scout team. I also was able to advance the the team on the right flank, with a SL and the Rifle Grenadier team to a position just south of the houses on the road behind a hedge and close to the other entrenchment that was placed on road in the previous game. I still could not get the American's to deploy!

I am always fearful of the Bazookas, despite being in a Panther. But it was time to finish off the game so I advanced the Panther up my left flank and got almost to the road. P-Y had move one of his JOP's back to protect it. It was certainly well protected as it was placed in a high walled garden. The Americans had already had one JOP in difficulty as it was in a burning house and I had observed that the other 2 JOP's were quite close to each other. This could be it. I advanced the Panther down the road, but this is where I made a big mistake. I left my side armoured exposed and the tank got ambushed at close range. I felt I was done for but P-Y threw just one hit, despite being 4+. An easy save. The Panther advanced and was able to get within 4" of both JOP's. P-Y withdrew! 


On to Table 5-Consthum Village with a Blitzkrieg!

08 October 2020

The Last Ditch-Bloody Bucket (6c/10)

We played our 10th game (actually 11th but one had to be replayed) last evening in our Bloody Bucket campaign. With this game, all tables have now been attacked at least once, some several times. This was also the last battle in turn 6, nominally the first day of the battle for Bastogne. In turn 7, we move to the 2nd day of that battle where my support options are now 12 + 5 for each time, there is a re-attack. 

I wanted to attack Table 6, so my supports would be 22 the next time I attacked. I also wanted to do some reconnaissance to see what P-Y supports had on this table. I really had no expectation of winning this game, but surprisingly it was closer than could be predicted. 

Sturm Platoon #2
CD 5 Green FM 8
1 SL (CR reduced to 6")
3 man rifle grenadier team
1 Sturm Squad w/JL (-2 men)
1 Sturm Squad w/JL
1 LMG Squad w/JL 

Supports
Pregame Barrage
Panther

American Rifle Platoon
CD 5 Regular FM 9
2 SL's w/ Bazooka Team
3 Rifle Squads w/JL

Supports (?)
2 Minefields
Entrenchment
0.5cal HMG team
SL

Game Summary

As usual it was almost impossible for me to get good JOP's, they all ended up on the table edge. I was able to get one up on the western edge but this was immediately stymied by the placement of 2 minefields.I got an early double phase so was able to place my Panther on the road on overwatch. I then followed with my Sturm Squad with 6 men, behind the Panther. I was able to advance rapidly up the table and shut down 2 of the American JOP's. Things were looking good. I had a pregame barrage so that slowed the American deployment but they did get 2 squads down in the area to the right of the HQ (house on the right side of the intersection). These threatened my Sturm squad behind my tank so I had to place my LMG squad in the open on my left flank. This worked as I was able to rush the Sturm squad to the large barn on my left flank and capture the JOP there. This did cost me as they were fired by one of the American rifle squads before they got in losing all but 2 men. By now FM was down for us both, I was really handcuffed by the fact that I had no more troops to capture the HQ so had to rely on a FM drop to win the game. We went back and forth for almost 4 hours, I was able to take down a lot of Americans but while the the American FM had dropped to 5 mine was now 3. P-Y was able to deploy his HMG in hard cover and that was about it for the Germans. A hard fought American victory. This was a brutal game with both sides losing 17 men.

The Summing Up: Battle 10 /Turn 6c

The Americans lost 8 dead men with 5 wounded on Table 6.

Sturm Platoon #2: 16 dead, 5 wounded-pretty well a spent force!

Campaign Tracker
Germans
Men's Opinion -11 (-3FM), CR 6", I am now called the Butcher by my men!
Overall Commander Outlook Secure

Americans
Not tracked

So on to turn 7, I rolled up a 4, so VG Sturm Platoon (6), so positions are as follows at the beginning of turn 7.

Turn 7-German Force Position and Strength 
Sturm Platoon 1 unknown (11 dead)
Sturm Platoon 2 unknown (16 dead, 5 wounded)
Sturm Platoon 3 unknown (7 dead)
Sturm Platoon 4 unknown (9 dead, 6 wounded)
Sturm Platoon 5 unknown
Rifle Platoon 1 unknown
Sturm Platoon 6-Assembly Point A 

01 October 2020

Holzthum Village 2nd Assault Fails-Bloody Bucket (6b/9)

Another game in our campaign last evening, this was a Blitzkrieg from table 2 to table 3. In a Blitzkrieg you take the troops that have survived the last battle and you immediately attack the next table. There is no post battle campaign process. As you can see from below I was missing 2 full squads. The American were missing 15 men from the last battle.

Sturm Platoon #5
CD 5 Green FM 9
1 SL
3 man rifle grenadier team
1 Sturm Squad w/JL
1 Sturm Squad w/JL
1 LMG Squad w/JL 

Supports
Sniper x 2
Pregame Barrage
le. IG18 x 2 (but missing 5 crewman)
LMG squad
SL
Adjutant
Medic

American Rifle Platoon (missing 15 men)
CD 5 Regular FM 10
2 SL's w/ Bazooka Team
3 Rifle Squads w/JL

Supports (?)
2 Minefields
2 Barbwire
Entrenchment
0.3cal MMG team
Mortar Team
Bofors ATG
I am finding it very difficult to get a good patrol phase in any of these games because the Americans have got 2-3 free moves as the defenders as a part of the scenario design. Really can not advance at all before I am shut down. But not much use whining.
So this was somewhat of an unusual game. As you can see above, I had all my units deployed.....on Overwatch before one American unit deployed. Phase after phase went by, no change, I had 4 CoC dice and P-Y had almost 4. I just do not have the patience that P-Y has so on my next double phase, I jumped the LMG behind the centre hedge over and decided to try to move forward towards the road to try to capture one of the houses to use as a base of advance. See below.
The game then got interesting. P-Y decided to ambush with his MMG team into the entrenchment that was on the road. I interrupted him and was able to take out 3 crewman. He fired back, I was in the open, took a few hits, lost a man or 2 and some shock but was still good to go as I was not pinned yet. I opened up with my le IG18 on the road, no effect. The game then entered an extremely aggressive stage on both sides. P-Y deployed a Rifle Squad into charge range but I interrupted again by retreating, I needed only 6" to get behind the house in safety. I rolled a 1,1,2. I was done for, and my squad routed, but they were a support squad so only took 1 FM hit. But by now all Overwatch's were gone and P-Y got a double phase at a critical moment. He was able to wound my SL twice and kill my Rifle Grenadier team, my morale dropped to 3, I withdrew. I actually only lost a 3 core men in this battle as well as a support LMG team, but I had to add in the results of my previous battle as this was a Blitzkrieg.

The Summing Up: Battle 9 /Turn 6

The Americans have now lost 10 core men on Table 3  as well as 4 men from their support infantry teams and 2 men from their Bofors.

Sturm Platoon #4: 9 dead, 6 wounded.

Campaign Tracker
Germans
Men's Opinion -8 (-2FM)
Overall Commander Outlook Secure

Americans
Not tracked

Not looking good, the best FM I can have now is an 8, very unlikely to move first in any further games, CR of SL is 6". I still have the opportunity to attack another Table in Turn 6, it will be table 6 with Sturm Platoon #2.

23 September 2020

Holzthum Road Taken...Barely: Bloody Bucket (6a/8)

Another game in our Bloody Bucket campaign last night, an attack on table 2 by a fresh Sturm Platoon from Table 1, I decided to go with the Attack and Defend scenario this time rather than the Probe. I had the advantage in supports so a morale victory seemed a better choice.

Sturm Platoon #4
CD 5 Green FM9
1 SL
3 man rifle grenadier team
1 Sturm Squad w/JL
1 Sturm Squad w/JL
1 LMG Squad w/JL 

Supports (24)
Sniper x 2
Pregame Barrage
le. IG18 x 2
LMG squad
SL
?

American Rifle Platoon
CD 5 Regular FM9
2 SL's w/ Bazooka Team
3 Rifle Squads w/JL (less 1 rifleman)

Supports (table2)
Minefield x2
Barbwire x3
Entrenchment x2
0.3cal MMG team
Sniper

We both started with a FM of 9, but Pierre-Yves got the first move when we diced for the tie. The game started off slowly as I got a number of double phases early on so was able to place the 2 Anti-Infantry Guns, 2 snipers, a LMG team, as well as a SL on the table very quickly, all on overwatch. P-Y had the worst dicing I have seen, in respect to Command Dice, he did not get one double phase in the whole game. So at this point it was looking good for the Germans, they had overwhelming supports and a pregame barrage, but as usual my deployment was quite effected by the placement of 2 minefields. I had not taken an engineering team but I really needed my ones for the multiple teams/snipers I had, so this was not a big deal. 
I was able to get the American FM down to 6 by taking out the American 30 cal MMG, but then I had no targets left as the only American unit on the table was a sniper. Some double phases came up and I wanted to make something happen, so I placed a Sturm Squad in the open with the plan to run them towards an empty entrenchment, they moved ahead and got in the entrenchment, looking good. The forward entrenchment was close to an American JOP. I got another double phase, so I advanced out of the entrenchment and was quite close to the JOP but was in the open, it was OK as I could roll again. I then decided to deploy the 2nd Sturm Squad in front of the hedge, with a plan to advance to the entrenchment just vacated.  Two squads in the open but it was going to be OK as I had the next phase. I rolled a 6,4,4,2,2. Sturm Squads do not have teams so, I needed a 1 or 3 to move them!
The Americans put down a Rifle Squad, the Germans were shattered, a 2nd American squad came down the 2nd Sturm unit took multiple hits. Now my FM was 6! What a mess of things I made. I realised after the game that I could of interrupted as I had 2 + CoC dice. The Sturm squads are lethal at close range as they throw 24d6. What a miss!

I was now in a dire situation, but I still had a lot of fire power and I now had targets. Shots were traded back and forth, I was able to weaken the 3 American squads behind the hedge. I killed 2 JL and caused one squad to break.
American FM was dropping, I was able to temperance their fire back with smoke grenades.
P-Y was able to fire back and destroyed one of my IG, my FM was down to 4. I fired back the American FM dropped to 2, P-Y decided to withdraw. 

This should have been a much easier game for me to win, but I got inpatients and as I usually do miss things, like failing to interrupt twice. Unfortunately my plan to Blitzkrieg Table 3 does not look as attractive, but I am still thinking about it. Two full Sturm squads and an IG down makes it a challenge.