19 October 2016

Walking through Tuscany

I know I have not posted much on my blog recently, but I have been away. We have just got back from a superb 2 week trip to Italy which involved a very nice walk through Tuscany. Over the last few years we have favoured more active holidays, having cycled through Languedoc as well as had a walk along the Amalfi coast. This year we decided to go for a nice walk. I had not been to Tuscany for years and Jennifer never has been so it was a natural choice.

I am not a great photographer of scenery or of little painted men but I thought I would post a few photos of our trip. We landed in Pisa from Gatwick after a very short overseas flight from St John's Newfoundland (less then 5 hours). Neither of us had ever been there so why not. The plan was then on to Florence for a few days before we took the train to Chiuisi, our gateway to Tuscany.

Pisa
First time we had been to Pisa
You can see that I am a little nervous about heights.............
.............my wife less so
Florence

Getting ready to climb the La Campanile of Giotto, all 414 steps
Buildings in Florence are all beautiful: Santa Maria Novella
The most famous of all
So Italian
Florence at night
Red roofs from our hotel room
Boboli Gardens
Cypress Alley
The Walk

As you can see, our walk was to the southwest and then back north to end the trip. Each day ended up being 12-15 miles, with the third day being the shortest but by far the toughest because of the 2 very significant changes in elevation. I would say the walking was moderate to moderately difficult. I found days 3 and 4 a little more tough as there was no village to stop in to have a lunch. I am not one to sit down in a field and have a picnic, and the last 2 days we took our nourishment while walking. It was much more pleasant to sit down and have a glass of wine with a lovely carpaccio. 
 Day 1 Montepulciano to Pienza via Montechiello

Ceiling of our B&B room in Montepulciano
Fortifying ourselves for the walk the next day, the wine and food was just superb
A bit of a wet start...............
............but cleared almost immediately, San Bagio church in the farground
Our first destination the hill town of Montechiello
Look cheerful, we do not have a selfie stick
The afternoon darkens, Pienza in the distance, this was quite a climb
Pienza in the morning

Day 2 Pienza to Bagno Vignoni via San Quirico

Most mornings started off cloudy............
...............but usually improved
Hill towns in the distance
Another darkening afternoon and another hill town ahead
Bagna Vignoni was the only place in which we stayed that was in a valley; very small place with thermal hot springs but a lot of black flies, but we were able to enjoy another night out 
Still looking quite cheerful, it must be the spritz
Day 3 Bagno Vignoni to the Abbey of San Antimo

The next day's walk was a little unusual, it was mostly through wooded areas at the beginning with  some significant changes in elevation. The first climb was 800m with a 500' change in elevation......pretty steep
We then ended up walking on a high ridge for a while until we again plunged down to the river  Orcia. We had to cross one of it's tributeries. My wife Jennifer was quite agile with this, I wish I had taken a photo of her jumping from rock to rock with the pack on her back. I am a little less agile and had to wade across. 
Once out of the river valley there was another long climb ahead of us.
Along the way we passed many castles which have been converted into exclusive  resorts. We were told to stay away as they do not like tourists............I wondered as I walked by whether it was a Bunga Bunga party place!
Tons of vineyards in the second phase of this walk.
The climbs just never stopped on this day, you can see that even Jennifer was getting tired.
I was quite plucky as you can see and soldiered on.
Finally San Antimo in the distance.
We had a look around although we were pretty tired.
Day 4 Montalcino to Buonoconvento

The last day started off looking OK when we got up and had a look from our hotel room, but the forecast was not good.
This was through well developed farmland
Started to getting cloudy, soon after it started to rain, the first adverse weather of our trip
Starting to look a little demonic maybe.
You can see a little colder too.
The famous tree of Salti di Pieve, we stayed at an Agriturismo  just outside of Buonoconvento, this was very nice
hmm...........Trump voters or maybe Brexiters. As an aside, I was unable to convert pounds sterling to euros in Rome at the money changers except at a very severe discount, the best I was offered was 0.80 euro to a pound (on a day when the official exchange was 1.12).
 Rome (where all roads end)

There is no place like Rome
and as should be obvious, there is nothing else I rather be doing
Already for a good shop on the Via Condotti.......she had a very good one indeed..........well into 4 figures

Well it was really a great trip and we are already looking at more walking trips, there are plenty out there. Back to work and soldiering.

18 September 2016

Closing the Gap: The Crossroads

Yesterday we finally got in our next game in our Falaise Gap campaign. It had been 4 months since our last game, both myself and Mike had busy summers, but oddly enough we really had no problem with the rules. They seem well imprinted now. This was our seventh game in the campaign, I (Canadians) had won the last two games and was clearly looking for a victory to clinch the campaign. Famous last words!

I packed up the car and headed off to Rhode Island, it is a bit of a drive but it was a nice day and I find the drive quite relaxing. Added to this was I was driving my new A7 as well as anticipating an excellent lunch that I knew Mike's wife Paris would provide.

It was my choice of scenario, and the only one we had not played was The Crossroads (Scenario 5 in the campaign book), this had a significant number of buildings but I felt we probably had enough houses. This is scenario 3 from the main rule book, Attack and Defend.

By now in the campaign the Canadians had almost sealed up the Falaise Gap, all they had to do was seal off the centre of St Lambert sur Dives and the Germans would be prevented from retreating to the east. Defending the town were hardened German Falischirmjägers,  these are a strong force with 2 LMG's per squad. The Canadians morale was high though and all though having suffered about a 15% attrition rate they planned to attack with vigour.
Canadians attacking from the right
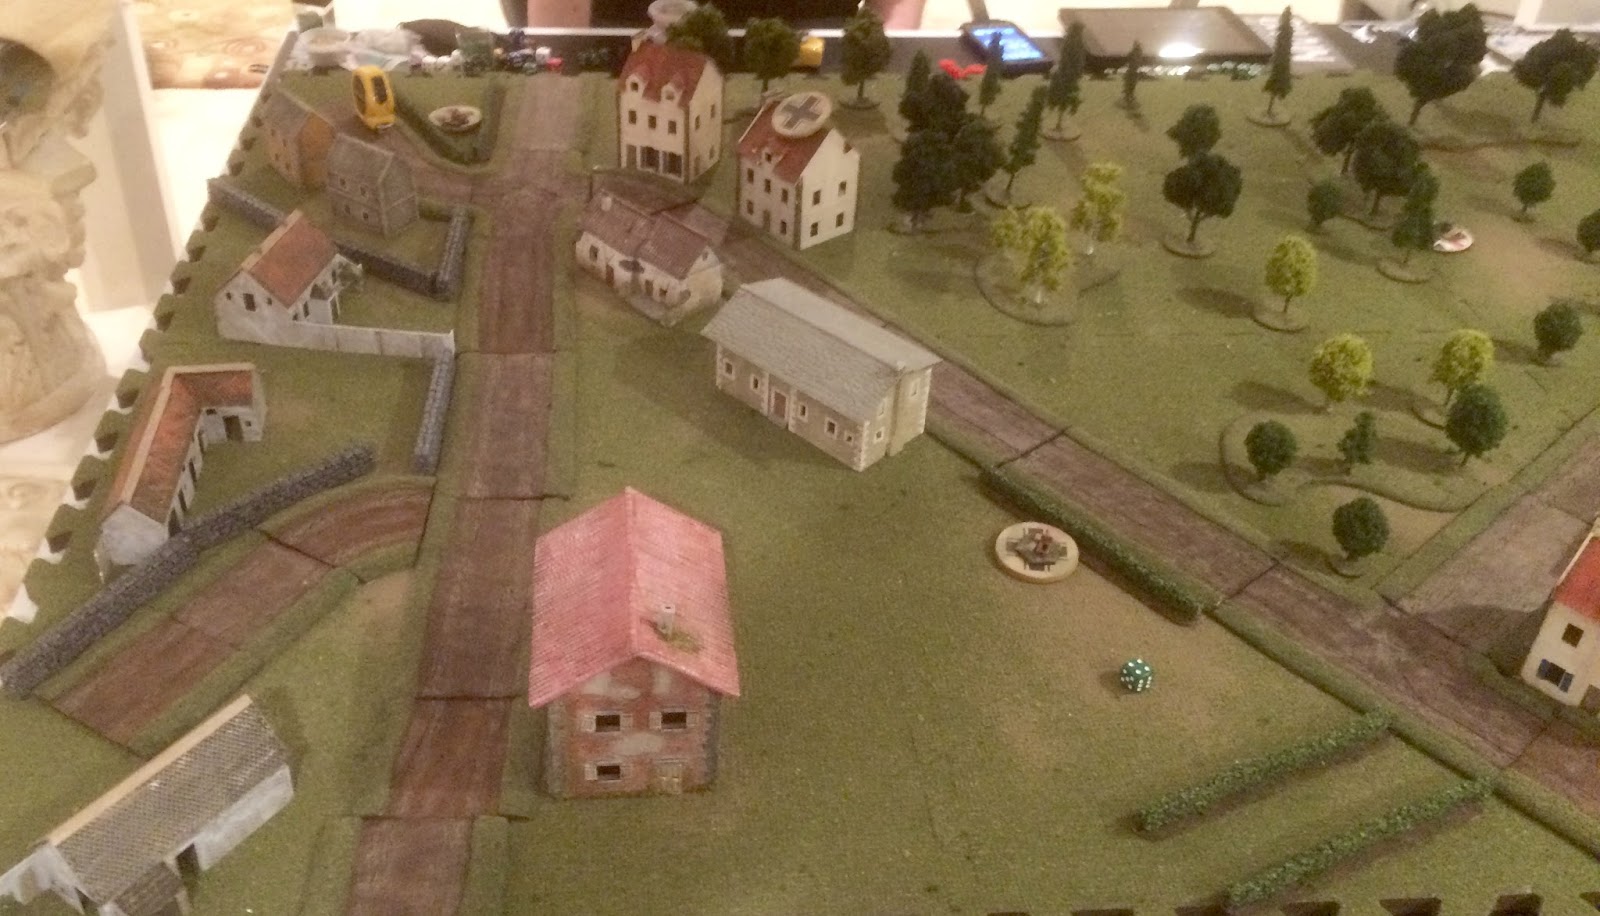
The terrain, the forest filled the whole triangle and blocked LOS.
The German defensive position
Looking from the point of view of the Canadian advance.
The end of the patrol phase, the Canadians got 3 free moves
The 3 Canadian JOP's
The 3 German JOP's
How it looks on the scenario map
My initial steps were to lay down smoke in front of the German positions and then advance section 2 through the forest  to capture the isolated German JOP. I moved section 2 to support this and provide covering fire. I also advanced my Sherman down the road to provide HE support against the German FJ's deployed in hard cover in the houses. I had 18 support points while Mike had 7, so I knew it would be very unlikely that he would select an AFV. I had selected a Pregame Barrage as well as Allied Air Support. This made it quite difficult for Mike to deploy his troops in the first turn and the air support took out one of his LMG teams, things were looking good for the Canadians. I had also selected a Vickers HMG team as well as an extra 2" Mortar team. I like laying down smoke.

Everything was going according to plan, I waited until I had a CoC dice before capturing the JOP, so I could end the turn and force a Morale Test. I planned to split section 2 so the Germans had to divide their fire. Best laid plans!

Things were going according to plan, but immediately after capturing the JOP, Mike got a series of double phases (maybe 4-5), with these double moves he was able to chew up the Canadian section 2, causing me to take a morale test for breaking and then another for being subsequently destroyed before I could get them off the field. Additionally Mike was well prepared for my Sherman with what I understand were multiple Panzerfausts. Two FJ's jumped out in the road and fired this powerful weapon and kaboom my Sherman was knocked out. Bu now my morale had dropped to 5 and German morale was still at 10. I made one more attempt but lost another team and dropped to a Morale of 4. My command was falling apart to I made a tactical withdrawal.
Lots of smoke!
Here is the position after game 7. The campaign is no longer than 9 games, if the Canadians have not defeated the Germans by then the Germans have essentially made it through the Falaise Gap and escaped to Germany. Mike had an impressive victory moving the Campaign Tracker to 9, the only way I could win now was to reduce this to zero, as I lost my opportunity in this game to win 3 games in a row. I had essentially lost a full section. The Germans had lost 2 men, there was no way I could win, so I surrender the town to the Germans. A German campaign victory. Congratulations to Mike on a very well played defensive victory.
Well it was a great campaign, Mike is a real gentleman and an absolute pleasure with whom to game. All there is to decide on is which campaign we shall play next.

08 August 2016

Type B Imperial Japanese Army Rifle Platoon (1941-42)


I have not had a whole lot of time for wargaming activities recently, quite busy at work and getting things organized in the house. I particularly hate the summer, so f...ing hot, it really makes me quite lethargic!

While in Montreal, I did finish off my Type B IJA Rifle platoon for Chain of Command. I had done 2 LMG squadrons and a couple of supports, but I still had the grenade launcher squadron, a 3rd LMG squadron as well as a number of supports to do. I finally got the basing done today and have had a chance to take a few photos.

The force is quite complete, I would like to get a Ha Go Tank, as well as some engineers but that is about it.
A Mixture of Eureka and Warmodelling figures as well as some Waterloo 1815 1/72 Plastics
Warmodelling LMG Squad
Eureka LMG Squad
Mixed Eureka-Warmodelling LMG Squad
Grenade Launcher Squad, Eureka on the sides and Warmodelling in the middle.
Type 97 20mm ATR Team in front, with a Sniper Team, a chappies with a Rifle Grenade and AT Suicide Plunge Mine, Tank Hunter Team and a Type 94 Tankette in the back row from left to right. The Rifle Grenade and Lunge Mine figures are from the Waterloo 1815 Plastic 1/72 plastic range.
From left to right; a Type 92 MMG Team, Type 97 Chi-Ha Medium Tank and a  7cm Type  92 Infantry Gun with a JL from the Waterloo 1815 Range. Little more slender than the metals but no problem mixing in.

The 1941-42 IJA List for CoC
A still have two squads of USMC as well as a Raider squad to paint to complete the opposing army for the IJA, but thankfully they are almost done and should get posted within in the next month.

23 July 2016

GBCoC v2.6 Albuera

Myself and Adam got together last Thursday for another game of GBCoC (the Napoleonic variation of the TFL rules Chain of Command). The most recent playtest version had a major re-write of the command rules and the movement rules.

Command Rules: In the original version of GBCoC, units were activated by command dice (5d6 with each value activating a different level of command or giving bonus options). Unlike WWII CoC each commander that was activated could pass 1 of his command initiatives down the command structure to activate a sub commander within 9" and then this commander would be completed activated. A GdD has 4 Command Activations each time he is activated and thus if he activated a GdB, this sub commander would have 3 Command Activations. This cascading structure was very useful in allowing a player to activate almost all his units but at the same time there was a lot of Command Activations out there which really slowed play. Version 2.6 removed this command cascade in an attempt to shorten the length of time each player was taking to make his command decisions.

Movement Rules: In the original version only activated units got to make a standard movement (3d6 in inches for a French Attack Column) and unactivated units got to make a single d6 move. In version 2.6 all units can make a standard move. At the same time a standard move was shortened if a unit started within 12" of an enemy unit, by essentially removing a d6. At the same time all maneuvers were now at the cost of a d6. This did simply things. Standard movement does not allow melee to take place you can only move or fire at close range.

Command Activations: Four new Command Activations were added to the original group of Directing Battalions, Passage of Lines and the Shock Removal. These include Hurry (add 6" of movement to an individual unit), Inspire (allow a unit to enter an enemy ZOC), Coordinate (Directing Battalions and Passage of Lines on the regiment or brigade or halt a single unit before it makes it's full movement) and Direct (allow a Artillery Battery to fire at long range, they automatically fire at short range).

There were some other minor changes. When I originally read through the latest version I became quite alarmed but on playing the latest version I found they were simpler than thought and will accomplish the objective of speeding up the game.

This was the position of the troops after the first turn. I believe the French (on the left) started at their picket line while the Spanish held back initially. The British had to start in March column with their tail on the edge of the terrain.
The Spanish after the initial unsuccessful French cavalry attack moving back into line. I was able to maintain good order over the Spanish with the Coordinate Command Action. Their line never faulted. 
The French centre and right flank, you can see the lead regiment advancing in Ordre Mixte  with the battalion in line having sent out a skirmish screen. This was quite effective although the Spanish Cavalry were able to hary this regiment to slow their advance. 
The British reserve which were never activated as they were not required. The Spanish in front of them held the British army's right flank. History repeated itself.
The British right flank was a little less successful, I was able to break 2 French battalions, but my somewhat uncoordinated attack resulted in the breaking of my largest battalion. By now 3 hours had past, the French had lost 2 regiments and 2 battalions and had suffered numerous command casualties while the Allies had lost only 4 stands with 1 battalion routing. Although we did not finish the game because of some miraculous Force Morale throws by the French it was a clear Anglo-Spanish victory so we ended the game.

I believe most of the rule changes were quite successful and both simplified and sped up the game. There are certainly some rough edges with some anomalous effects of the new movement rules. We were also a little unclear about the ADC function in respect to command actions. But one would have to expect some uncertainty after a major revision.

You can find Adam's AR here, I will let him speak for himself, his photos of the action are much better than mine.

I would like to add with the loss of the cascading command, the player has less ability to make all his units do what he wants them to do. On the surface this may make it seem tougher but in my way of thinking this allows the player to focus on his strategic plan rather then the tactical details (i.e. less units moving tactically each turn). I believe this lack of choice did speed up the game. The ruleset is now more similar to WWIICoC, with a greater reliance on strategic planning with the Command Dice function now serving to instill Fog of War than purely a unit activation tool.

Finally, I will quote the rules writer Darren Green:

The position of Commanders on the battlefield is extremely important. Commanders need to be positioned so they can influence units within their Command Range. It is essential to use the order of battle to move your forces: keep Regiments and Brigades together as the building blocks of your force. It may be tempting to send individual battalions off to gain temporary tactical advantage, but it will become impossible to coordinate your force once combat gets started. New players also try and get their whole force into contact. Unless they have a really good command team with several Dynamic Commanders, this is a recipe for uncoordinated, piecemeal attacks which nearly always fail. The best advice for an attacking player is to choose a Brigade for the attack, deploy it so that Commanders can make best use of orders such as Directing Battalions, and position the Divisional General close to the Brigadier so there is a high probability that one of them will be activated each turn to keep the attack moving. 


10 July 2016

Sharp Practice: Escorting the General

Last night we had our 3rd game in as many weeks here in Montreal and I finally got to participate in a game of Sharp Practice using version 2. I did not play myself but refereed the game between Iannick and Rusti. Both players were unacquainted with TFL rules in general but were very well acquainted with the FIW rulesets and history. We had all previously played Muskets and Tomahawks and This Very Ground. I have enjoyed both these rulesets but I was looking forward to SP2 as it uses very similar mechanisms as Dux Brit and Chain of Command. I like the command and control mechanism in TFL games and I have to say as I get older it is much easier to play multiple rulesets if they all have similar mechanisms.

We played the Escort Scenario, with the English being the escorting force and the French being the attacking force. The French were the Raiding Party from the rulebook (49 points corrected) and the English had a made up force of 3 Status II leaders, 2 units of Colonial Rangers and 2 units of Indian allies (48 points). For supports the English increased 2 of the leaders to Status III and took a preacher. The French took a second deployment point and a mobile deployment point as well as elevating one of their leaders to status III.

The English started in sector 1 and had 2 free moves, while unfortunately the French ended up in their sector 4. The starting morale for the English was 11 and for the French 9.  I believe we got through 4-5 card decks before the French morale failed. One thing noted was that the tiffin card ended up near the bottom of the deck in all the turns so there was a lot of card play.

We really had no problems with the movement, firing and fisticuffs mechanisms and were able to use the unit characteristics and card functions without difficulty. The game was quite smooth and both players enjoyed themselves.

I did not take a whole lot of photos but I did take some.
We are looking up the board here from the British edge (the escorting party). I the middle of the photo you can see the red-coated personage Colonel Blimp. To the left are the British allied Indians. The colonel is with 2 units of Colonial Rangers. In the far group on the hill to the left are the Coureurs de Bois, some Milice Canadien are in the middle. The French were a bit unfortunate in getting their primary deployment (wagon on right edge) in the segment next to the British launching point. With 2 free moves the British were a third of the way up the board.
A unit of French Allied Hurons (right) bearing down on the Colonial Rangers with some Mohawk in support, the colonel is starting to sweat. 
One of the major encounters of the game between a unit of Rangers and Milice about to happen, it headed up with both units being annihilated , but the Ranger winning by one but routing because of shock with the colonel. By now the French Morale was down to zero, so maybe a marginal British win.
Well it was a fun game and I look forward top my next. I did have some simple questions and comments that were quickly answered on the TFL forum

30 June 2016

Getting Ready for Sharp Practice

Three posts in 3 days, a record I believe! I have been looking forward to the release of this ruleset. I had never played Sharp Practice 1, it sounded a little iffy and complicated but Sharp Practice 2 sounded like just the thing. From what I understand from those who know better than me, it is a revolution from the initial version taking much from Chain of Command and Dux Britanniarum for this complete rewrite.

Hopefully I will get in a game within the next couple of weeks and in preparation for the same I have been realigning my French Indian War forces to play the game. I already had put a British force together for Muskets and Tomahawks and after a look through the rulebook I felt it best to put a late (1756) British Regulars force together. I needed to paint only 6 more British infantry and 6 more Indians to field this unit of 3 Status II leaders, 1 Status I leaders, 2 units of 8 British Infantry, 1 unit of 6 Colonial Rangers as well as an Indian force of 12 figures. I have figures to supplement this force with 2 more units of Colonial Rangers as well as a 10 figure unit of Colonial Militia.

Like Chain of Command, there is support lists that include artillery, priests, musicians, standard bearers, water carts, ammunition carts, engineers etc etc. In anticipation of this, I also acquired some carts from Warbases UK, as well as some sabots. Over the last couple of weeks I have painted up these additional figures and carts. 
Here is my present force which I believe is around 72 points
3 units of Rangers, painted up as Roger's, Dank's and Gotham's from front to back
2 units of British Regulars painted as 
Iroquois
Colonial Militia
Leaders, the proverbial Big Men!
Engineers Cart (list 5), need to find some engineers.
Ammunition Cart (list 3)
Water Cart (list 2)
Sabots from Warbases with rare earth magnets
These metal discs were a challenge to find, no one makes round metal bases except a company in the UK called Products for Wargamers. They have multiple different sized bases from 20-50mm in diameter
I am really impressed with the carts from Warbases, easy to put together and look quite good for something made out of mdf. They really are a first class company. Well priced (especially now with the plunge in sterling), rapid delivery and brilliant over all service.

Well that will be it for a while.

29 June 2016

A Most Interesting Kickstarter

I am not one to act as a shill for Kickstarters, but I came across one this morning that I thought I would pass along. Each morning I usually go through my blogroll to see what is new and on the Meeples and Miniatures blog there was this most interesting post.

Miniature Wargaming: The Movie............wow.

Here is the Kickstarter, I pledged for the DVD. For us in North America the pound sterling rate is pretty good, why not!

Second Kickstarter I backed today.