Showing posts with label Gembloux Gap. Show all posts

20 August 2021

Gembloux Gap-Across the Dyle (10)


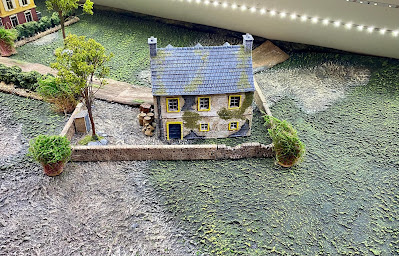
Tuesday night we got in our tenth and final game in the Gembloux Gap campaign, in my last post I said it will be 2-3 weeks before I get the terrain together but once I laid it out I felt I was ready to go. No railway stations and some variable walls but it looked ok once it was on the table. Again, Janne and Eero showed up for the game. I am not sure how they do it at 0200h their time, but they tell me it is quite exciting to watch and after watching most of the previous 9 games, I am sure they wanted to see the grande finale.

Dice were rolled and the game started:

Germans (FM 8 (-1 on FM roll) (3 Schützen Regiment)
Schützen Platoon #3 (less 1 man)

Supports (18)
Fifth Columnist
Red Dice
OT MMG
PGB
PzII
PzIV
Demo Team

French (FM 8) (-1 on FM roll)(110e Régiment d'Infanterie)
Infanterie Platoon #3 (less 5 men)

Supports (12)
Escouade de Fusiliers Motocycliste
Canon de 47mm ATG
PGB
Roadblock

Patrol Phase: As usual we played out the Patrol Phase on P-Y's ap. The smaller dots are the JOP's, while the numbered dots are the PM's at their final positions. The game was based on the Attack on an Objective scenario from the the main rulebook.  To win the game I have to exit 2 units off the western edge of the table. The French could win by expending 3 CoC dice and blowing the up the route. I was lucky and got 4 free moves, I was sort of expecting P-Y to place 1 forward JOP but he did not. I was fairly happy with my JOP's as I wanted to leave the impression that my attack was going to be along the road.
The German Plan: As you can see from above, I had 3 routes to get off the table. I had sense that P-Y would take a roadblock in this game so I did take a demo team but my main reason for taking it was to deploy the team early near the road to make it look like that was my plan. A lot was up in the air but I felt my best option was to advance unit towards all 3 escape at the same time while adjusting things on the fly as the French laid down their defenders. What do they say about "best laid plans"! I should note that P-Y placed the road bock about 12" from the French edge of the table.

Terrain Considerations: We decided to stick to the RAW as much as we could. High Walls prevent troops from firing from or to, they are major obstacles. Troops can toss grenades over them as well defined in the rules. We added that if troops are within 2" of a high wall they are shielded from fire from 2nd story windows. The Roadblock only impedes vehicle but does provide light cover. 

The Action: The first throw of the dice fell to P-Y, I think he rolled a double phase but not a lot of use as the defender. We both had Pregame Barrages, so there was going to be some limitation in deploying but I was generally pretty lucky as was P-Y when he finally decided to deploy. I rapidly deployed the demo team, a SL and a squad south of the road and another squad north of the road, these were initially all out of LOS or in cover on Overwatch. I then placed the PzIV on the road. P-Y kept his powder dry and would not deploy. I sent the demo team just south of the road to make it look like they were heading to the road block. I had also placed my Off-table MMG on the road on the German edge. A very narrow focus of fire but it did cover the road. I felt that my 5's would be more useful firing the MMG than accumulated CoC dice. I was proved to be very wrong! Anyway onto some snaps.
Demo Team
Squad 1
Squad 2
PzIV
Pz IV initial advance
The French finally deploy with 2 squads in this row house, we treated the first 4 houses in this block as a single unit so once inside a squad could move through the whole block. In his initial deployment P-Y placed a squad on each floor with the LMG and 4 riflemen facing east within the house with the other 5 riflemen and JL lining the windows in the middle house above on both floors.
On the protective cover of the PzIV, Squad 1, the Demo team and the SL advance to the cover of the wall. 
Roadblock Position
Squad 2 has now advanced to the house, in the next phase they enter it.
The PzII has arrived to support the infantry advance, any deploy by the French in the houses lining the north south road will be met by a hail of HE from the 2 tanks and the Mortar team. I was now ready for the final advance.
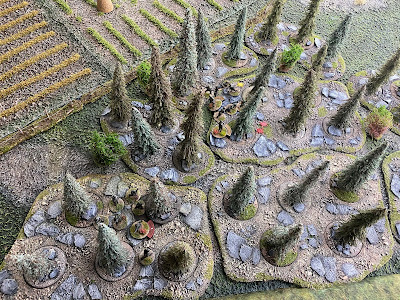
As you can see squad 1 has climbed over the  first wall with the SL . They have ran through the garden and then climbed over the second wall. Squad 3 which had deployed as far south in the forest as they could have advanced across the open field to the protection of the barn. What you can not see that Squad 2 has now left the house and deployed onto the road. Squad 2 had taken some desultory and ineffective fire from the French inside the house. P-Y still had only deployed 2 squads

So at this point it was time to make a rush for the west and German victory. P-Y had accumulated 2 CoC dice so was close to blowing the route giving him a French victory. Three German squads were deployed within 18" of victory but were all in the open. It was the French phase and it was time for P-Y to deploy his defenders! Again back to the photos.
P-Y deploys his 3rd squad (less 5 men) to meet the oncoming Germans, they fire and cause some damage on the Germans. I had prepared for this deployment by having 5th Columnist, but P-Y rolled a 6 and they came on. My plan was now looking pretty shaking. In the next phase I caused some shock.
P-Y then deployed an ATG on the road, it fired 4 HE, no real effect.
Now for the cinematic move of the game. The German squad 2 is within 12" of the deployed French ATG. Time for Handgranaten! The Germans throw some grenades but only score 1 shock, they throw 3d6 and make contact. We tally up the dice 13 vs 13, not as good as I thought. But I get 6 kills to P-Y's 4. The ATG  gun team is wiped out. I have some kills but little shock and most importantly my JL survives unscathed.
The French phase, P-Y again fires his infantry squad but I have 2 CoC dice, I interrupt and wipe out a good proportion of the squad, but P-Y has some good dice and is able to deploy his Motocycliste Squad, combined fire from them and the guys in the house wipes out Squad 1 and injures my SL, my FM drops to 3.
I throw my 3 CD. Squad 2 makes it off the table half way there! Squad 3 makes their move they only move 4" they do not make the edge, so close but so far! But I do have an ace (or should we a CoC dice) in the hole. French phase, but with my CoC dice I am able to interrupt and Squad 3 makes it to touch!

So game over, this was one of the closest games I have played. The end of another campaign, so what is next......well I suspect we will end up in a jungle....where I am not sure yet, but stay tuned!

13 August 2021

Gembloux Gap-Defending the Heights (9)

Last night we got in our ninth game in the Gembloux Gap campaign after a couple of postponements. Two of my Finnish friends, Janne and Eero, showed up for the game. I am not sure how they do it at 0200h their time, but they tell me it is quite exciting to watch. 


Dice were rolled and the game started:

Germans (FM 8 (-1 on FM roll) (3 Schützen Regiment)
Schützen Platoon #3 (less 2 men)

Supports (12)
Fifth Columnist
Red Dice
MMG Team
PGB
PZ III

French (FM 9) (110e Régiment d'Infanterie)
Infanterie Platoon #3

Supports (7)
Escouade de Fusiliers Motocycliste
Canon de 47mm ATG


As usual we played out the Patrol Phase on P-Y's ap. The smaller dots are the JOP's, while the numbered dots are the PM's at their final positions. The game was based on the Hasty Defence scenario from the the Blitzkrieg rulebook. P-Y was forced to deploy all his PM's in the #2 sector (NE), while I favoured mine in the south east edge. As you can see, I did well in the Patrol Phase with one of my JOP's just 15" from the northern edge. To win the game I have to exit one unit off the northern edge and control 2 of the 3 northern sectors.


The Action
JOP's
My initial deployment, with a squad to the far north, any double phase will allow me to run the northern rifle team off the board ( I did forget that they could not run on their 1st move as they were in the cornfield). Also placed a SL and the Mortar team on the edge to supply initiative and support.
I placed my PzIII on the edge and then rapidly moved  to the north, I was less than 8" from controlling the northeast sector (and driving backwards as Eero pointed out). Oh for a double phase!
P-Y played his first move by deploying a squad in the woods but they were 3" from controlling the northwest sector. 
The French deploy a squad on the southern edge of the forest to tackle  the mortar team. They have some difficulty though deploying quickly because of the Pregame Barrage as well as my secret weapon......
.........the Fifth Columnist
A German Double Phase, now is the time to strike. The Germans add a squad to the MMG team on the hedge, they add a SL as well as advancing the team along the road to the north. The other SL orders the rifle team to move north with their JL. The Germans then start to pummel the French with the newly deployed infantry squad.........they take shock and their JL is killed. French morale is down to 5. Second throw of the dice.......................

..................the German infantry team exits the table..............
The PzIII occupies the Northeast sector.......
The MMG and the Mortars break the French squad, FM down to 3.
 
The French withdraw. Final position of all the troops...a German victory, onto the game 10 on Table 6.


Butcher's Bill

Germans (platoon 3)

Final FM 8
0 loses (1 man dead in next game)

CO +2
MO +2
Prickly (-1 FM)

French (platoon 3)

Final FM 3
3 men dead, 2 missing for next game

CO +2
MO -5 (-1FM)
Happy


So I suspect that it might be 3-4 weeks before our final game in this campaign, the terrain requirement for the last game in the campaign is quite significant as you can see below. I suspect the FDM printer might have to be brought back into action as well as having a need to make some more railway track.


20 July 2021

Gembloux Gap-Get the Guns (8)

This was the Germans 3rd attempt to take this table and the 8th turn in the campaign. To win the campaign, I have to win this table and the next 2 tables without any more loses. To win a narrow victory I have to get to win table 5. Another loss on this table was going to end up in a draw. Thus this turn was a must win for me. My biggest decision was whether to take my third platoon or not, as Platoon 2 was down a full squad. The French have been doing well with their platoon 2, which had been down a squad since the first game on table 4. I decided to take my last platoon, but I really had to be cautious with them as they had to be used in 3 games. This was going to be tough. Platoons and known supports are below.

Dice were rolled and the game started:

Germans (FM 8 (-1) (3 Schützen Regiment)
Schützen Platoon #3

Supports (14)
Jean-Claude
Red Dice
Off Table MMG
IG18
Stuka

French (FM 11 (+1) (110e Régiment d'Infanterie)
Infanterie Platoon #2 (less 10 men)
Canon de 75 m1897

Supports (5)
Entrenchment
MMG


As usual we played out the Patrol Phase on P-Y's ap. The smaller dots are the JOP's, while the numbered dots are the PM's at their final positions. The game was based on the Attack and Defend scenario from the CoC rulebook. I had 1 free move so this did little to help my rapid advance but I decided to focus on the northern part of the table. I had lost too many men in the wheat field to make it attractive.


The Action

My Stuka attack got me off to a good start, I missed the building but I got 12 shock initially on the first French squad to deploy and 9 shock on the 2nd. Unfortunately, despite opening up with my OT MMG, I was unable to to pin them, P-Y was able to get his SL's on the table and was rapidly able to remove shock. I wanted to hold off deploying my IG until I knew where he was going to place his 75mm Heavy Gun. As it turned out P-Y ended the turn with three 6's pretty quickly.

My plan was to target the weak spots on the French line with the OT MMG and Jean-Claude while advancing at least 2 squads in the northern woods while deploying my IG, Mortar team to support the OT MMG and Mortars, as they would be best to reduce cover. Timing her was everything and although I stuck to my general plan I believe my timing was off with the IG placement (my position was good as only the southern part of the French force could target it). I was slow in placing supporting teams though and it cost me. I was never able to take advantage of the initial shock that was placed on the 2 French squads and P-Y was able to recover them.

I was able to cause some morale losses with the constant fire from the OT MMG and my 3rd infantry squad which I placed on the southern margin of the woods. Although I was taking some morale hits myself I was able to move my IG out of LOS as well as the supporting 3rd infantry squad before I was destroyed. I did lose a SL as well as my Mortar team in the process. 

The French Morale was now 4 while the German morale was 5, 6 command dice versus 4. P-Y, despite only having 4 dice was able to remove almost all his accumulated shock and move his southern line off the hedge so out of LOS. I had moved all my units out LOS. I then advanced 3 squads to the west, just staying out of LOS. My OT MMG continued to fire at the French squad behind the stone wall. I felt that I was now in a good position to win the game, I just had to be patient and wait for a double phase and advance all 3 squads in a firing position (54d6) and with the IG gun (6d6) rain terror down on the French squad with a SL in the north with a high likelihood of a complete morale failure........the French withdrew! On to table 5.
The German positions targeting the southern French defensive line
Southern entrenched defensive line
The French withdrawal out of LOS
German advance
The OT MMG marker
The French northern defensive line

Butcher's Bill

Germans (platoon 3)

Final FM 5
5 dead, reduced to 4 by FM (1 man missing, 1 man dead in next game)

CO +1
MO +1
Cautious (-1 FM)

French (platoon 2)

Final FM 4
7 dead but last game for Platoon 2

CO +3 (+1 support)
MO -2
Secure

03 July 2021

Gembloux Gap-Get the Guns (7)

I have to admit I really do not have a clear idea on how to take this table. The initial plan for my first go went OK in respect that I denied one of the houses to the French for a firing position in hard cover, but now they will get a free entrenchment to convert 1 team to hard cover and will probably add one for a single support point. They are already set up for hard cover in the north because of the stone wall. I am finding without armour the approach through the cornfield is quite treacherous. It is covered by the canon de 75 m1897 which is lobbing covering reducing 6 HE at a time. My hope was that I could move through the forest and get at the edge with 2 units on overwatch before the French could get behind the stone wall and overwhelm them.......best laid plans!

The canon de 75 was in position at the beginning of the game.

Dice were rolled and the game started:

Germans (FM 10) (3 Schützen Regiment)
Schützen Platoon #2 (less 5 men)

Supports (13)
Red Dice
Pre-game Barrage
IG18
Off-Table MMG
Jean-Claude
MO


French (FM 9) (110e Régiment d'Infanterie)
Infanterie Platoon #2 (less 11 men)
Canon de 75 m1897

Supports (7)
MMG
Entrenchment

As usual we played out the Patrol Phase on P-Y's ap. The smaller dots are the JOP's, while the numbered dots are the PM's at their final positions. The game was based on the Attack and Defend scenario from the CoC rulebook. I had 4 free moves but really did not advance my PM's through the northern forest to gain much advantage.


The Action

Unlike our previous games, P-Y's dice were quite good, he started off with a double phase and despite me having a pre-game barrage he got all his units on the table within the first few phases....all on overwatch .....before I had got any troops in position aside from the OT MMG.
Not even sure how to approach this defensive line.

I had taken an Off-Table MMG which was able to kill one of his rifle teams but solely because they were in light cover, everything else was in hard cover.
Anyway a placed a squad in the cornfield on tactical, got Jean-Claude in position. The sniper was good at scoring hits on the French leaders but every saving throw was a 1 or a 2, thus no effect. The IG18 went in the forest but really could not advance safely and the squad in the field started to get chopped up and made a run for the forest line but got pinned before they could make it and before I knew they had broke, a series of poor FM rolls brought my FM down to 3, time to withdraw. I ended up having my platoon reduced by a full squad, dropping my CO and MO, and advancing the campaign clock by one with the only gain being a single French gun team crewmen killed. A very unsuccessful game.
Jean Claude, the collaborator; you are leaving me alone!

Butcher's Bill

Germans (platoon 2)
Final FM 3
7 men killed 
(7 killed, 3 missing next game)
CO 0
MO -2
Cautious (-1 FM)

French (platoon 2)
Final FM 8
1 man killed
(10 dead next game)
CO +4 (+1 support)
MO -1
Sociable (+1 FM)

01 July 2021

Gembloux Gap-Get the Guns (6)

We had the next game in our Gembloux Gap campaign on Monday morning this week. The Germans have moved on to Table 4, this is a tough one. Speed is of essence, but no armour! The French have a free heavy artillery piece.


Here are some photos of the table.
I had a simple plan in this game, to destroy one of the houses and try to run up the table to deny one of the JOP's to the French. I expected to lose this game but I wanted to be in a good position in the next try on the table which uses the Attack and Defend scenario from the CoC rulebook.


Dice were rolled and the game started:

Germans (FM 10) (3 Schützen Regiment)
Schützen Platoon #2

Supports (12)
Red Dice
Extra Schützen Squad
Stuka
Jean-Claude


French (FM 9) (110e Régiment d'Infanterie)
Infanterie Platoon #2 (less 12 men)
Canon de 75 m1897

Supports (8)
Sniper
MMG
Entrenchments x 2 (this was in error)

As usual we played out the Patrol Phase on P-Y's ap. The smaller dots are the JOP's, while the numbered dots are the PM's at their final positions. The game was based on the Swift to Support scenario from the 1940 book. I started at the #2 arrow and had no free moves, I did as well as I could have with a JOP at the edge of the forest and one in the cornfield.


The Action

The game went as expected, maybe a little better initially. I was able to get 2 squads on the edge of the forest unscathed with 2 squads in the cornfield as well as JC and the 50mm mortar team. The Stuka attack took out the most important defensive building the large villa in the south. It caught afire. The wind blew to the west, thus the smoke had no affect on the game. The French had been able to build their defensive line to the north but still had not got a lot of units in the south. I threw my dice, I had a SL with each grouping of units, it was well set up that I was going to get 2 squads to fire at close range on the French in the north with a back up of the 2 squads in the south. Almost any combination of dice should of helped. I threw the dice and all I could fire was the one squad in the forest...amazing! I threw the dice I got 10 hits, but the French saved them all. In the next phase, the French were able to load up their defensive line and they were able to fire. I had to use an interrupt to withdraw one squad in the forest. All my squads started to come under fire from the French VB team, 2 infantry squads the MMG team and finally the canon de 75 m1897. Time to withdraw despite having a superior Force Morale. Victory to the French.

Withdrawing troops in the forest, struggling to get within 12" of their JOP.

French defensive  line


Butcher's Bill

Germans (platoon 2)
Final FM 10
7 men killed (3 killed, 2 missing next game)
CO +1
MO -1
Irritable (-1 FM)

French (platoon 2)
Final FM 8
1 man killed
1 dead, 2 missing (10 dead, 1 missing next game)
CO +3 (+1 support)
MO -2
Secure

 P-Y played quite a good game, he was patient and waited. It resulted in a win.