Showing posts with label 3D-Printing. Show all posts

21 August 2025

ACW 15mm Terrain


Recently, I have been working on getting some Pickett's Charge games back on the table. This is a ruleset by David Brown which is similar to his Napoleonic ruleset Général d'armée. I played quite a few games several years ago with my friend Adam but have never set up a game in Montreal for our wargaming club. I am a little limited as I do not have a CSA army but I am working on this now. I also know that version 2 of Pickett's Charge is in the works but I suspect that it might be another year or so before we see it.

In the interim, I felt it important to work on some terrain for the game. My sense is that terrain is more important for the ACW than for Napoleonics, especially linear terrain. I already have several buildings, crop fields and trees that are suitable. I do have a lot of snake rail fencing but otherwise my linear terrain and barricades were lacking.

To test my new Centauri Carbon printer, I thought it would be a good choice to print some small terrain especially picket fences which can be a challenge in any scale. What follows are my efforts.
It does not look like much, but there is 5' of snake rail fence as well as 5' of picket fence. 
Really happy with the print of these fences from 3D PrintTerrain ACW set.
Some log barricades 
This fencing was put together some years ago and comes from Battlefield Terrain Concepts. It was pretty beat up and I had to reassemble more than half of the pieces.
Some resin field barricades from Battlefield Terrain Concepts
A mixture of resin prints as well as some 3D Prints. I am not sure how the haystacks came out but I think they are OK.
Lots of 3D printed stone walls.

Overall, I am quite happy with how everything came out, and I should be good for most battles. I still have another package of snake rail fencing to put together.....a tedious job which can be put off in the short term, but for now I will have to shift focus to some CSA troops.

22 July 2025

Elegoo Centauri Carbon-First Impressions


Elegoo Centauri Carbon 48 hour Review


On June 2, I purchased and put myself in the queue for the new Elegoo FDM printer. This will be my 5th 3D Printer purchase, and the 3rd FDM printer. My last 3D printer was SWX2, this was pretty good printer and I got 2 1/2 years out of it. I had heavily modified it as well klipperising it but I kept on screwing around with it and final blew the motherboard. Time to throw it out as it was a bed slinger and the new CoreXY machines allow much faster speeds.


The most noise I heard on the internet was about the BambuLabs PS1 and the Elegoo Centauri Carbon. I knew that the Bambu was a solid printer as 3 of my friends had one but the price was at least twice that of the Elegoo. There was a sale in June at BambuLabs where I could order one for even less than the Elegoo but when I had difficulty ordering it and when it finally went though they automatically added an extra charge of $80 on PayPal with out informing me which took me a month to get back. I think in the sale they oversold and this was a computer glitch but it made me a bit uncomfortable with their processes.


So back to the Elegoo, my first printer was a Creality and the experience was poor and I am not too sure about their approach to Klipper OS. I have had a Elegoo Mars Resin Printer for a while now and it just works. I watched probably 30+ reviews and they were quite good. I am not looking to use exotic materials, it will be almost exclusively PLA. I wanted a CoreXY machine which ran on a form of Orca Slicer. What most impressed me was the release process, they started the release about a year ago and each release was in small numbers so they could get feedback. This allowed them to proactively fix issues with each release. I suspect my machine in a gen5 as the light and camera are improved, the packing was reinforced, many adjustments have been made to the software and the added materials were all quite useful.


It arrived 2 days ago; it was unpacked there was no damage, I removed 3 screws, turned it on, ran the 30 minute start up protocol and printed a benchy (15 min) withe the enclosed PLA. I then printed a benchy with some old Sunlu matt PLA. Both perfect. I ordered some Elegoo PLA+ and the roll came Saturday afternoon. So I started the testing various STL’s. I am doing terrain mostly. So that is where I focussed. I started with a large flat floor, no release or elephant’s foot A+, next a peaked roof, A+. I next went to very small prints (15mm) with no brims; fences upright, barrels with about a 2mm build plate contact as well as some more scatter pieces, A+. Finally multiple small pieces on one plate. No loss of prints.


I have to admit to being pleased, but this only 36 hours so more to do. I will update  my experience after a month.


I see no defects, 15 minute print

I prefer Orca Slicer, but the Elegoo Slicer allows you to paint your own tree supports


1/100 scale, these are tiny, printed without supports or brims.


23 June 2025

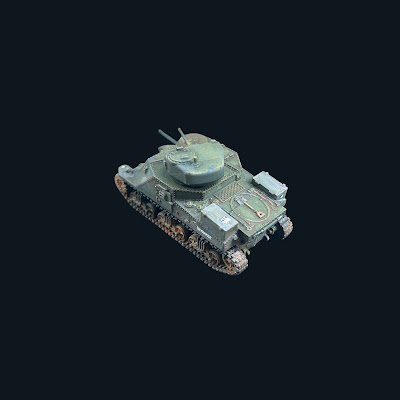
M3 Grant- A Bit of an Orphan Tank


I recently resin printed a M3 Grant AFV, I got the STL from a Canadian Vehicles kickstarter. I have to say that these were the best vehicle STLs I have received with supported and unsupported versions but also a hollowed version. I find hollowing vehicles a little challenging, so I was quite happy that this was already done.

Most of the vehicles in the kickstarter were trucks and it was an interesting collection but after some research not really a collection that was useful for wargaming. This was especially relevant to the M3 Grant which was primarily used for training purposes by Commonwealth armies except in North Africa where both the British and Australian armies used it for operational purposes.

I have to admit that I had not done this research before I painted the tank. So I will have to make it a training vehicle for the 2nd Canadian Armoured Division. 


But who knows it may end up being transferred to the Soviet Union where the M3 Grant did have operational history with a new livery.


28 December 2024

Movement Trays for Midgard


The latest offering from the TFL stable of wargaming rulesets is Midgard. The ruleset covers gaming from the Classical Period to the Late Middle Ages in both a historical and fantasy setting. It looks like an interesting game and I believe it to be quite accessible. If you have the appropriate historical or fantasy figures you are all set to go aside from needing the rulebook and some playing aids. But you will need some movement trays, in most cases 120x60mm in dimension. 

The ruleset appears to be extremely well supported by both the author on a dedicated Website as well as a Facebook group. There is also a section for Midgard on the TFL Forum. I find generally that TFL rules are well put together and since I had the figures I thought I would have a good look. 

There is quite a lot about the movement trays on the above sites with actually instructions for a magnetic type on the author's web site. Since I have a FDM printer I thought I would design some trays in TinkerCad and print them.

I have a fairly large Dark Ages collection of figures as well as figures for the Crusades so I was all set with at least 2 historical forces. Additionally I have a large collection of LoTR figures which would fit into the Fantasy setting for Midgard. 

I do have some painted Sengoku Period figures sitting about doing nothing as well as several unpainted figures and although these are just outside of the Late Middle Ages Period I felt they would work for Midgard. There are no lists for this period in the book but there is already many fan made lists for Midgard in existence and I understand that the Warring States battles are on the radar of several players so I thought I would start there. It will certainly encourage me to paint some more Samurai!

The foot figures were bought painted 15 years ago, I painted the mounted figures.
Midgard forces require 3 heroes, here is my first.
A unit of Warriors, they will be classed as Heavy Infantry
Heavy Riders
Another unit of Heavy Infantry

Tray Design

I have made 4 basic designs; one for Warriors, one for Skirmishers as well as one for Cavalry. I also have made a tray for the Japanese Heroes as they are all associated with standard bearers. The tray above accommodates 7 warriors as well as a 12mm wound die. My Japanese figures are on metal bases so I put a recess for a 5x1mm magnet in each. As you can see they are slightly above the recess for the 25mm base. I did this as the metal bases are quite thin and I wanted them to be level with surface of the tray. I can use these same trays though as slots for standard 25mm bases without the magnet for non-metal bases. You can use the dice recess or not, if you dod not want to use it then it can be covered with terrain material. I do appreciate that there are only 7 figures on the base but the number of figures in this rule set is not important and 7 will give the same mass effect as 8. The Cavalry trays will be 3 or 4 figures, while the skirmishers will have 4 figures.

Time to start printing some more trays and prime some more figures.


30 May 2024

28 mm Tanks

An early project for our Historical Wargaming Club in Montreal was to paint up 2 platoons of 28 mm figures, this was group effort and was relatively successful. Recently one of our members started playing a new ruleset from Warlord Games, Achtung Panzer. As a contribution to this effort, I decided to print some tanks with my resin printer. I play WWII in 20mm rather than 28mm, so this was a novel project for me. I had a look around but I then realised that I already had some STL's that I could use from the Hürtgen Forest kickstarter. The first 2 tanks I printed, a PzIV and a Hetzer went well. I printed the pre-supported versions and they came out of the printer without problem. I had a lot more problems with the M10 Tank Destroyer, for some reason the pre-supported versions were unsuccessful, so I had to add the supports myself. They looked good but when I was painting them I realised that on one side the wheels on the tracks were malformed. It was not that noticeable so I finished the paint job.

I forgot to take photos until after I had placed them in the cabinet, so the images are somewhat limited. The paint jobs are quite simple, I added some stowage. It was a bit of a challenge to find decals but I did apply some. Overall they are certainly serviceable for gaming. I may try to add more at a later time but on to different projects now.

02 May 2024

3D Printed Norwegians

As I was not 100% with the EWM for my Norwegians, I had a search around and there seemed to be a nice set on Cults3D, these are free but the designer has several other sculpts that are for the Narvik campaign, this includes some German sailors and I believe some French. What is nice about these figures is that they are scaled originally at 1/72 which is a little unusual for 3D STL's. Most are 28mm with a few 15mm. These were a little taller than the EWM and maybe a lot of my other 20mm miniatures (1/72 is I believe a little bigger than 20mm), and certainly thinner (more anatomic). I played with the scale and went with a 96% but this was probably not necessary. You might be able to see the difference as the King Haakon figure has not been reduced.

3D Print on left, EWM on right

I went with the same colour scheme as the EWM and am quite happy with the result. Although I have some reluctance, because of the concern of durability with resin wargaming figures, I will go on with these figures for my Norwegian platoon.

22 January 2023

Terrain-3D Printed


I bought a new FDM printer a couple of months ago and I have to say it really works well for me. My friend P-Y had bought an Artillery Sidewinder X2 and I was blown away how quiet it was. My Creality CR10S is really a piece of junk and I just threw it out. I am sure the 3D print enthusiasts who love to tinker with things (you know the type, the ones who offer advice on the product FB pages.....the psychos I mean) enjoy the Creality printers but the Artillery Sidewinder has just worked immediately when I took it out of the box.

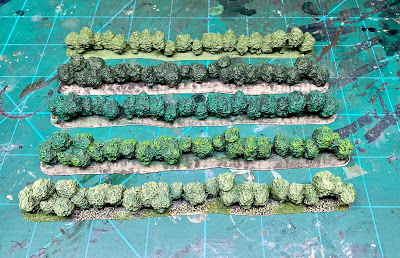
Anyway, I have been recently using a matt PLA which I really like and have been printing a number of different things. I have also been throwing a lot of terrain out which I have had for years, which I am just not happy with. Because of this, I have had to do some replacements. First up is some hedges for Chain of Command in 20mm. The hedges I have are in hard resin and are quite nice but in 28mm and really have not worked that well for my 20mm games. I had a look and found these on Wargaming 3D. It is odd as they say they are for 6/10mm but I find them perfect printed as is for 20mm. It might be that they are packaged as bocage.

From the top using a matt PLA from Polymaker. Then washed with dark green (equivalent of Citadel Camoshade). Dry brushed successively with VMC Dark Green, Olive Green and Deep Yellow. Bases are painted with Dark Umber, and dry brushed with a Mocha Brown followed by a Medium Brown Ballast and some green flock.
I will need some more pieces as this is only about 15' so far.

My Friend Luis sent me these STL's, I believe they are free on Thingiverse.
I might have used a darker brown weather powder, but I have a hard time resisting colour.
Might add some lighter flock.
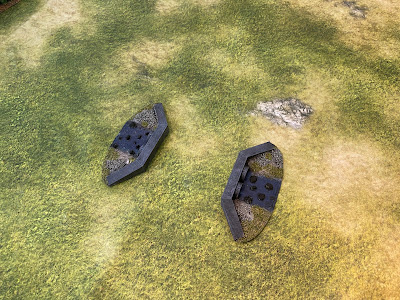
Single Culvert for Winter gaming
Double Culvert for regular terrain.

I do have a couple of more 3D printed terrain pieces to paint but my my biggest project recently is mdf terrain in 28mm mostly for Pulp Alley. Still have 2 more buildings to assemble and paint but I am getting there. 

04 September 2022

WWI Planes

About 2-3 months ago, I printed up some WWI planes to play the Algy ruleset. P-Y had already printed some planes from Thingiverse and painted them up. We have already had a couple of fun games. I always, however, like having my own toys and I thought it would be a bit of fun to try to print and paint some planes for myself. There was no real cost and it would be a learning experience for me in respect to 3D resin printing, the planes are quite small and they looked like a challenge to print. From what I understand WWI pilots being the individuals that they were were allowed to pick their own colour schemes for their planes. 

They have been done for a while now, I have noticed this summer that the polyurethane is taking longer and longer to dry and I hate photographing miniatures so there was some delay to taking the snaps. Time to take them off the table, so I took some photos today. I really need a better light source and I will get to it soon enough, I am in the middle of a massive move of my wargaming stuff from Massachusetts to Montreal and that is taking quite a bit of my time.

I am not even sure of the scale, I printed these planes at, but I think it might be 1/285. The WWII 1/600 planes were a lot of work to paint and I was not going to go there. I think it might have been a lot easier to print them at 1/144 as you will see they were a bit of a challenge to print. P-Y had already printed at 1/285 so I decided I would stick with that.

I did 5-6 trial prints with different supports before I got something barely acceptable but they did paint up nice enough aside from some missing struts/wheels as well as some bent wings. They are certainly useable though. The colour schemes are completely my own!
Sopwith Camels and Spad 13s
Albatross D3s and Fokker Dr3s
Well they are being put away in a box, I will apply some matt in a few months and that will be it.