23 December 2014

Chronica Iohannes: Thieving Saxons


We played the 6th scenario (5th game) in our Dux Brit campaign a couple of weeks ago, got a little delayed in posting because of the Painting Challenge. Because of the significant Saxon victory in our 4th game, the Saxons were able to win the Baggage Train scenario unopposed as I did not have the troops available to challenge them. Adam was then able to shower gold on his followers and they elevated him to the status of a Warlord.

This time we played the Sheep rustling scenario and I have to say it was the closest game we have played. We are now pretty acquainted with the rules so the game flowed quite smoothly, we still make mistakes but they seldom now affect the game outcome.

You can find an AAR on Adam's blog, but essentially the Britons eked out a narrow victory after a morale failure by the Saxons. The Britons suffered heavy losses but our next game will be set in September of 551. This will probably be the last game of this raiding season. With the money gained in this raid the Britons built the last of their 3 required Watchtowers and with some more gold Antoninius can be promoted to a Legatus.

09 December 2014

29, Let's Go: Flanking St Germain du Pert

Tactical Situation
As you will remember, the last game in our campaign was won by the Germans by an impressive margin. However they were down to to 3 LMG teams and 1 Rifle team from the original platoon. Leutnant Fuchs felt that a tactical withdrawal from Arthenay was the best next move. This would give him more time to prepare his final position in Osmanville. He had gained some time for his comrades to evacuate over the bridge at Isigny and for the pioneers to start laying their charges to blow the bridge. Meanwhile the American commander has realized that he needs to take out the Artillery that has been stalling his advance to the west. Local intelligence informs him that there is a German platoon as well as some mobile 88mm guns in the village of St Germain du Pert to his right flank. He sends in a fresh platoon with two Shermans to do the job.

So we were set for our 3rd game in our D-Day campaign last Saturday at the Hobby Bunker. This is scenario 5 from the main rulebook, and essentially the Americans start with 6 patrol markers along two sides of the table. The German are isolated to a 3x2' rectangle around the the village. They have been outflanked! Mike improved on this by getting 4 moves of his patrol markers before I even got to move one. The good news is that for this game I had a fresh platoon and two Marders in support. I had to other support choices. Mike had yet another fresh platoon and 19 supports two of which had to be Shermans, I know he had a some off table mortars as well a bazooka team. I am not sure what else. So we tossed for morale, and in this game we both started off with an even 9. Mike had to force me to withdraw from the village.
St Germain du Pert
American JOP's, the one in the farground gave me a lot of trouble
German JOP's
Being in buildings may provide hard cover, but is limiting. This was the only squad I really brought into action in the whole game, it did cause damage to the Americans but is hard to maneuver. I should have been behind the stone wall.
Two American squads advancing through the hedges..............
.............slowly but surely
One of the StuG's standing in as a Marder II, which actually should of been a Marder III, one of the several mistakes I made during the game. I was really asleep at the the wheel.
A very pesky American Squad, they are pinned here, but no matter how much I shot at them they would not rout.
The Americans used the hedges to good advantage.
The second Marder advancing, the first was taken out by one of the Shermans.
I thought I would play the game as I did the last ...conservatively. Mike was able to place a JOP within a 8" which was a really problem for me, not only did it make it easy for him to pile troops in right next to my defensive perimeter but also one of my JOP's was with 12" so suffering significant risk of being overrun. I placed a squad in the house with the LMG team and half the rifle team covering the north eastern approach to the village. I also placed one of the Marders on the table early on, otherwise I held all my troops in reserve until I had good close up targets.

As you can see Mike placed 2 of his squads to my right flank (southeast of my position), they were little threat as they had quite a bit of ground to advance over. He did this very cautiously. He brought on a Sherman as well, I was able to disable this fairly quickly with my Panzershreck team.

On his first double 6 throw Mike brought on a squad to the JOP next to the village, foolishly I did not put my LMG team on overwatch, so they were able to fire first causing death and shock on the team in the house. He was also able to get the Sherman to fire some HE at the house causing more shock before I was able to disable it with the PShk team.

I then got fixated on destroying this squad as they were threatening my JOP. And although I poured significant fire into the squad, I was never able to rout them. They took fire from two LMG teams, as well as fire from the hull mounted MMG on the Marders and even were ambushed from their rear by the third LMG team. Would not rout!

By then Mike was able to bring his second Sherman into play, and I had foolishly exposed the sides of both Marders to it's 75mm gun. In fairly rapid succession, both were taken out. I had very little luck on the Morale table and although Mike's morale was now 5, I had dropped to one. Time for a withdrawal to prevent a rout. So the game ended with an American victory. I lost 8 men and two AFV's while Mike lost 6 men and a Sherman. A fairly close game in that sense, but in the campaign a significant loss. The German morale is falling and will now test for -2 in the next turn.

I really played a poor game and we did make some mistakes in the set up and in interpreting the rules, but a good game was had. As you can see from below, Leutnant Fuchs is now become prickly and has a reduced command range of 6", but certainly Col Goode is less troubled.


I thought I would also post some photos of a SYW game in 15 mm. Most Saturday's when I am at the Hobby Bunker, this guy Mike is setting up a large game. I have always been very impressed with the look of his games. The airbrushed mat looks great and he has an expert ability to blend in his lay on terrain elements into the table. It certainly makes me think that I should have gone with Napoleonics in 15/18mm.


03 December 2014

The Annual Analogue Hobbies Painting Challenge

Well it is that time of year, I am not really sure how Curt does it but the 5th iteration of the Analogue Hobbies Painting Challenge starts this friday. 

I have participated in all 5, I think there were only a dozen contestants the first year, but this year there are 72. I just missed my goal last year of 1500 points, so this year I have put in for a 1000. 

I believe I have lost my painting mojo over the last year. I am now much more interested in gaming and constructing terrain around planned games. I think I also burned myself out painting over 3000 28 mm Napoleonics over the first 7 years of my gaming life. My painting now is more directed with focus on skirmish armies that I plan to use in WWII and Dark Ages/Medieval games. I still have some Napoleonics to paint though and I have primed some for this year's challenge. I still plan to paint a Dutch-Belgian brigade as well as another Prussian brigade but who knows. I bought a bunch of Flag Dude standards about a year ago, and that is how I measure my progress, but 15 more Napoleonic battalions is somewhat daunting.

I have though bought some Victorian Pulp/Horror/Steampunk figures from Westwind Production's Empire of the Dead line, which I will paint for pleasure. These are lovely figures, they remind me of the Conquest Miniature's French Indian war line which are the nicest figures I have seen and painted to date. I am quite looking forward to painting them.


So I am quite prepared this year, with most of the figures prepped as you can see from the above photo. I have also made selections for the bonus rounds each fortnight. I will keep them to myself but I suspect you can guess some of them from the below list. So what do we have.
  • A Soviet Winter War/Stalingrad platoon with supports from CPModels TQD line, these are really are my favourite 20 mm WWII line. I hope to do them justice. I believe there are roughly 66 figures here with a HMG and medium mortar, Roughly 270 points.
  • Next up is a 28 mm French Napoleonic limber with caisson from Front Rank, maybe 45 points here.
  • Then we see the EotD figures, 90 points.
  • Next to some figures to fill out my Moslem SAGA warband, 16 plastic archers from Gripping Beast and an Iman. 85 points.
  • More Gripping Beast Dark Ages figures for my Dux Brit British warband, 4 mounted cavalry and 8 elites. 80 points.
  • Some more Napoleonics, 3 British Artillery pieces from Perry and Front Rank, as well as a French Ligne battalion which has been on my painting desk primed for over a year from Crusader Miniatures. 200 points.
  • Three British AFV from Armourcast and PSC in 20 mm. 36 points.
I make that roughly 800 points, so with the 7 bonus rounds worth 50 points each, I should be good with some room to maneuver.
  • December 14: Cold
  • December 28: Mount(s) & Rider(s) 
  • January 11: Victorian
  • January 25: Myth
  • February 8: Hot
  • February 22: Comedic
  • March 8: Anti-Hero 
I should also mention that the challenge has it's own website now, so stayed tuned for all the action. Wish me luck.

24 November 2014

29, Let's Go!: Delaying Action at Arthenay

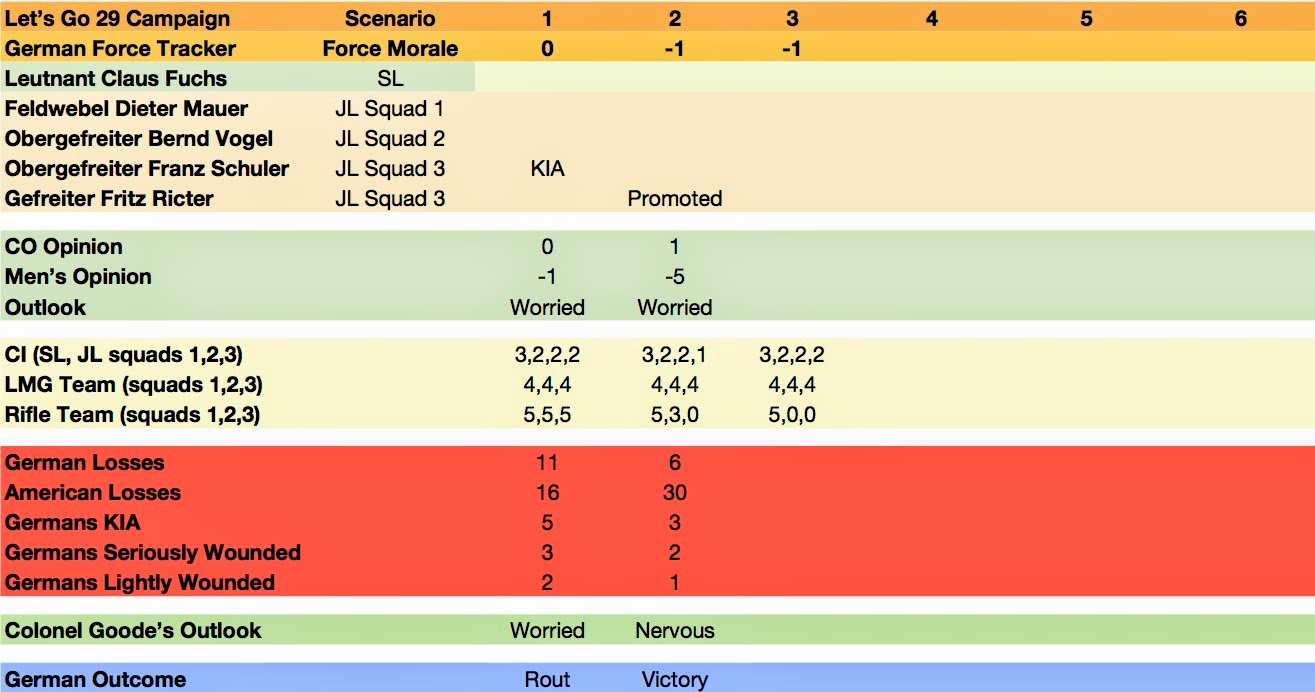
We had our second game in our 29, Let's Go campaign this past Saturday. In our first game, I (the Germans) got trounced and I started this game with -1 on my Morale, as well as missing 8 riflemen from my platoon. It seemed like I was in big trouble already, as the American force is always at full strength in each game. Fortunately between game one and two, Richard Clarke put out Talking Tactics, a primer on WWII platoon level tactics as they relate to Chain of Command. This is an excellent read and what came across to me is that as a defender with a weakened force, I had to play very conservatively.

So we started our game. I finally had got my hedge rows done, my bocage pieces made it somewhat difficult to play the last game as they blocked LOS which is not the case in this campaign. The scenario is #4 from the book. Mike threw a Morale of 11 and I threw a Morale of 9, adjusted down to 8 as I had started to lose the confidence of my men as we were routed in the last game. 

Mike had 19 supports which I believe he spent on a Sherman, a HMG team, a Sniper, and a 81mm Mortar. I went defensive and purchased 4 barbwire's, 1 team entrenchment and a 8cm Mortar. So let's go to the photos. I did start the game with 2 CoC dice, as well as two hidden Marder's on my left flank. Unfortunately they can only be used against American armour.

Shows the final position of the patrol markers (I had 3 and Mike had 4), Mike clearly was keen to go down my right flank. But of course cover always comes into play.

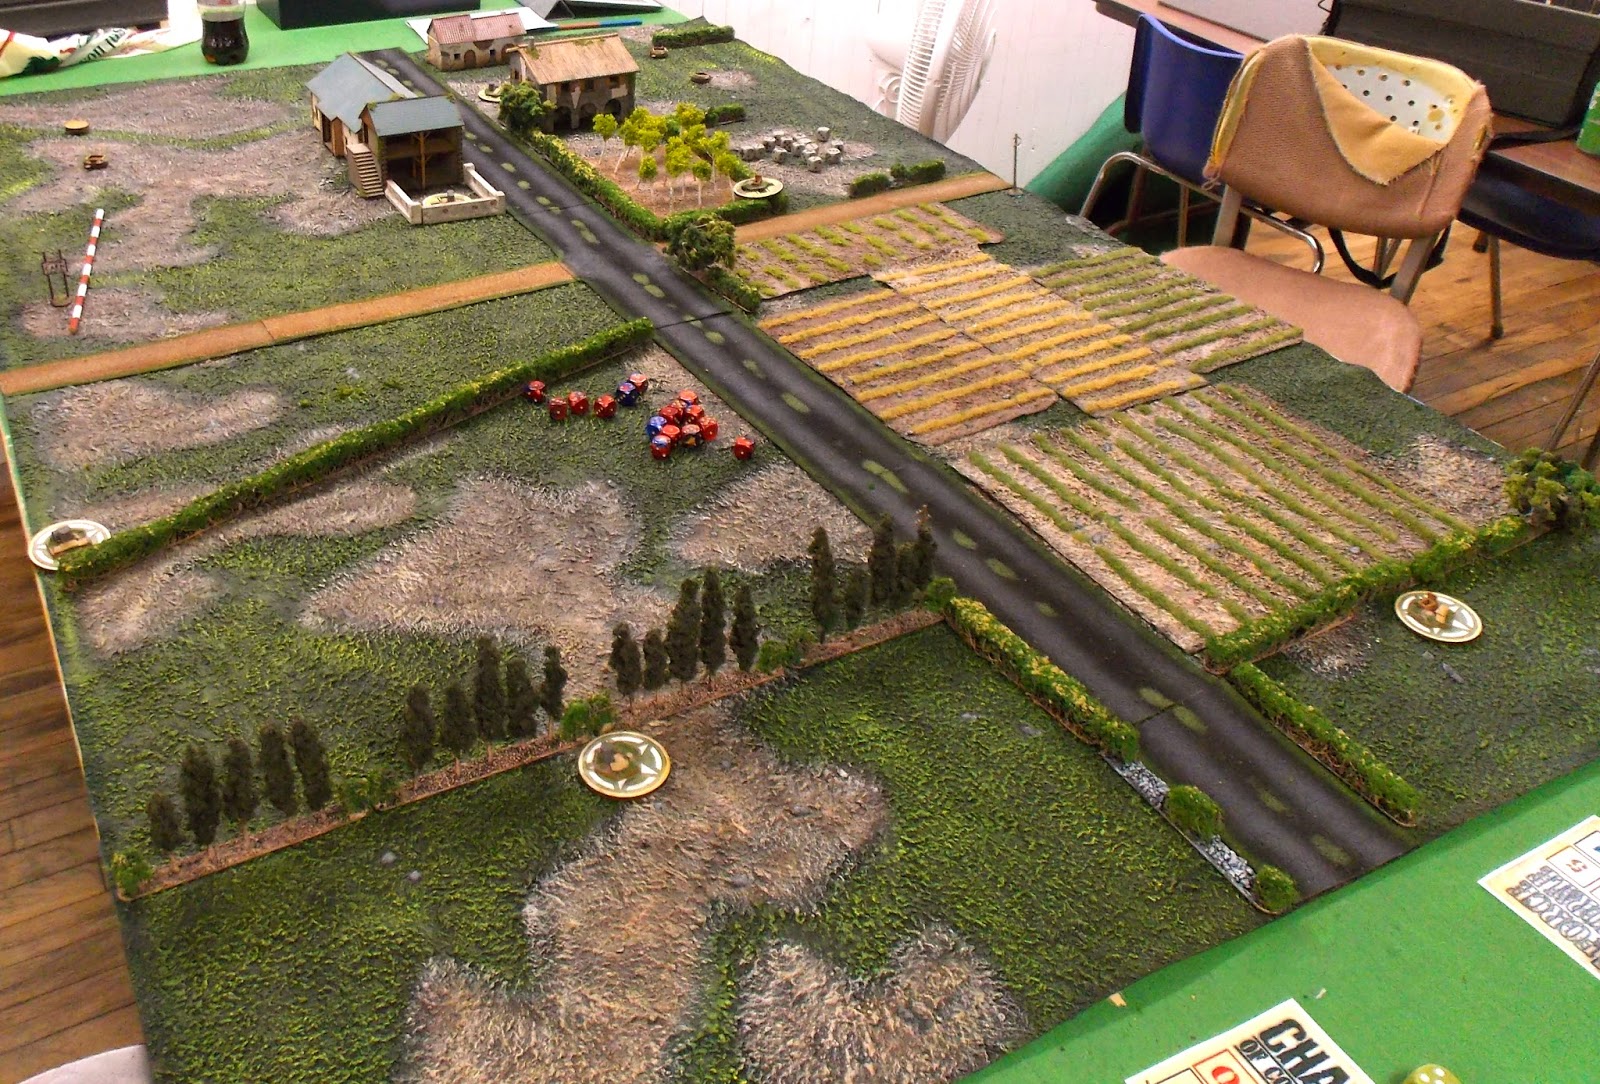
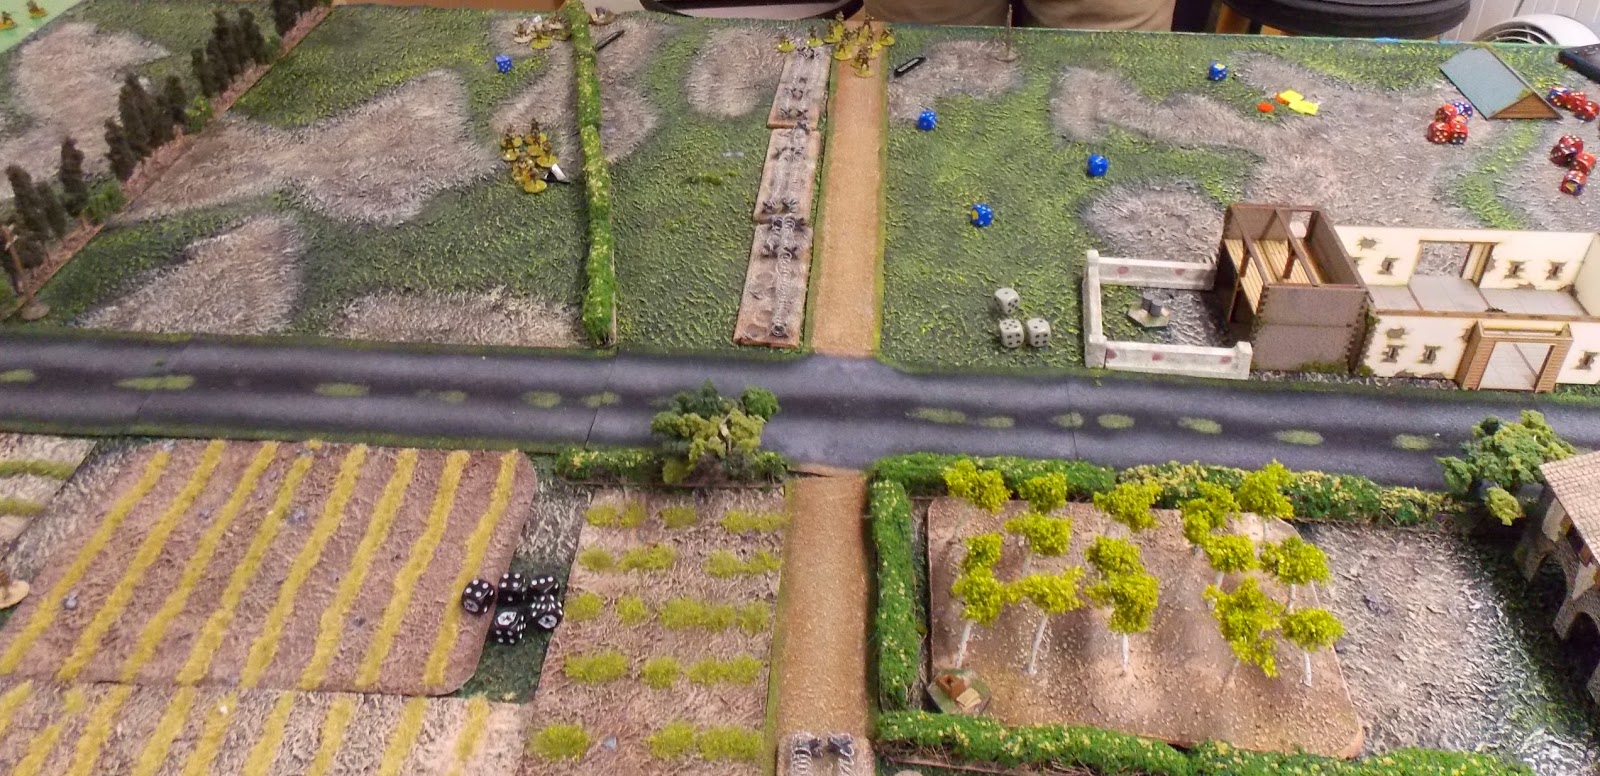
The final position of the JOP's looking from the American advance. Bit difficult to see the German JOP's, but there is one inside the fenced enclosure attached to the house on the left, one just to the right of the orchard and one between the houses on the right. To win the game Mike had to capture this JOP. I was quite happy with the positions as it gave me a nice inverted triangle of JOP's, each within close range of the other.

I placed my barbwire defenses just beyond the dirt road. I am not sure if this was the right choice as it allowed the Americans to advance up to close range of my planned defensive positions.

Oh No! Mike's first roll is a double 6 with two 3's and a 1, really the best throw imaginable at the start of a game.

Mike's PSC Americans, they came out looking great. This was the start of Mike's aggressive advance on my right flank 

Mike threw all his troops in early, with a squad starting to advance on my left flank through the crop fields, another at the edge of the orchard on my right flank. He placed his HMG team with his first squad as pictured above. A Sherman appeared in Mike's next phase. The American FO was also placed in the hedges by the fields.

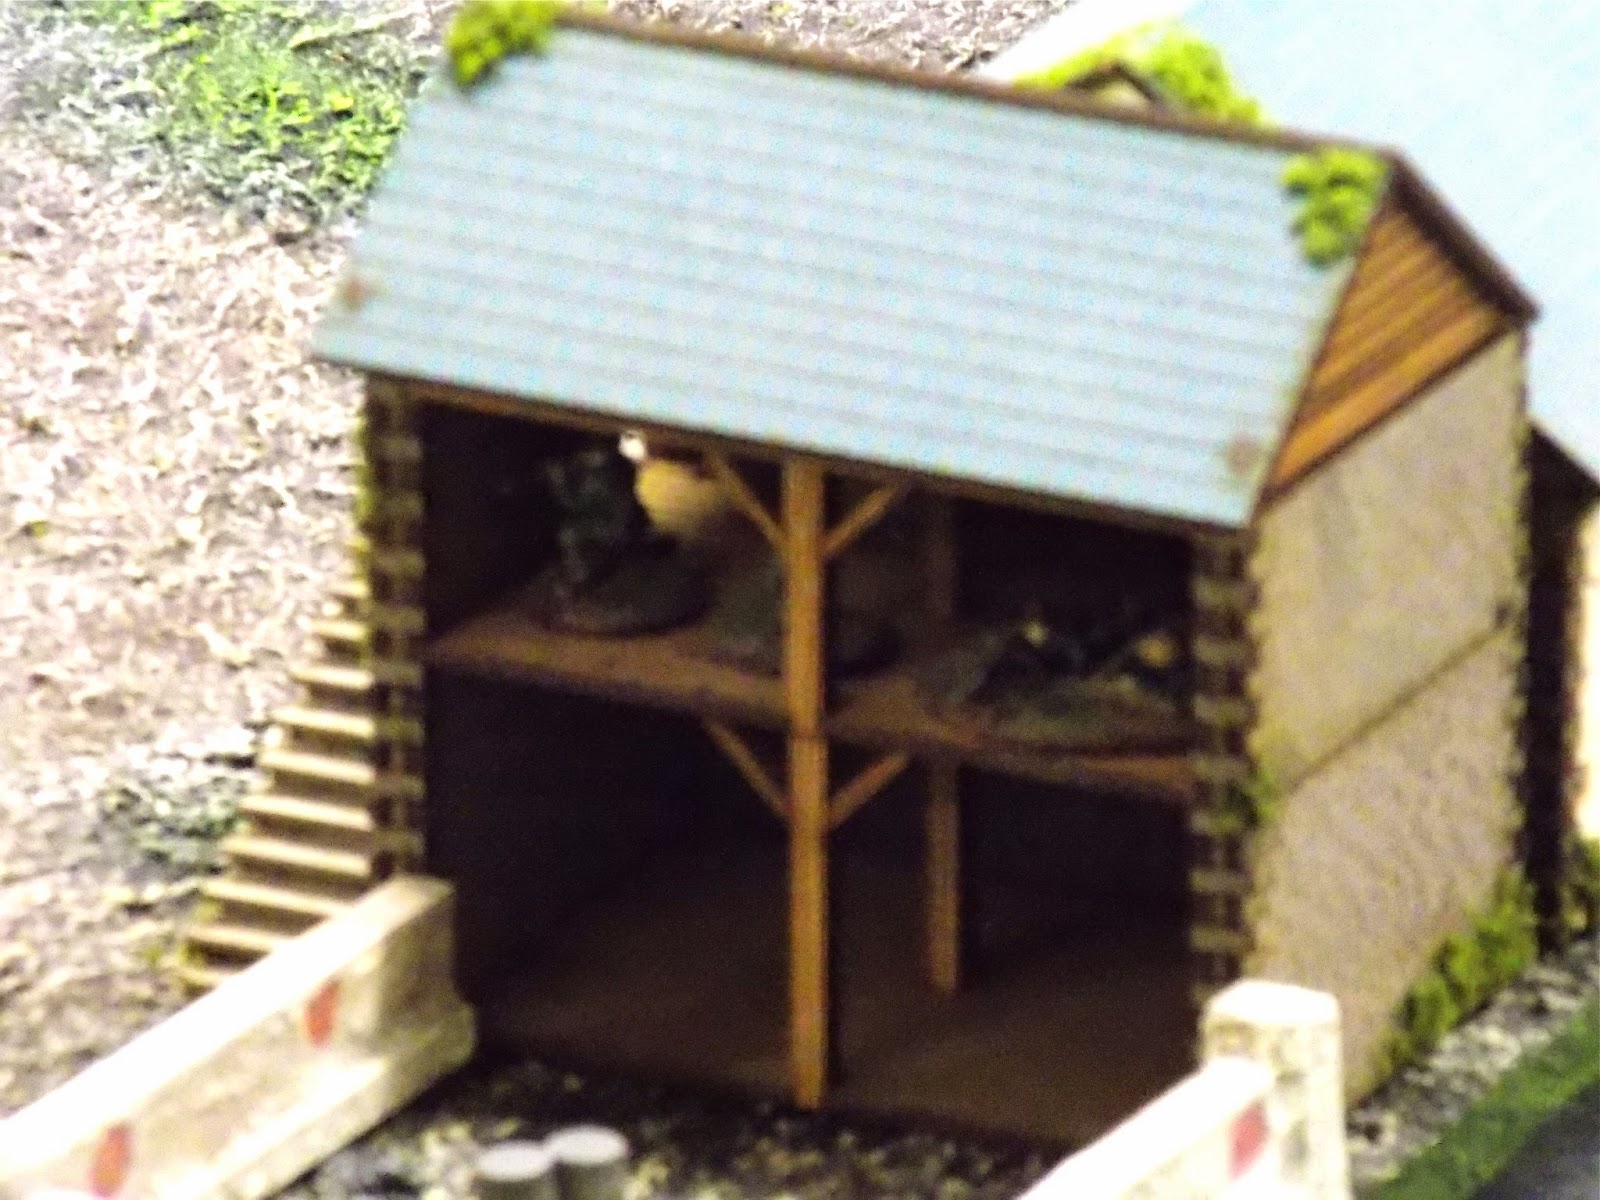
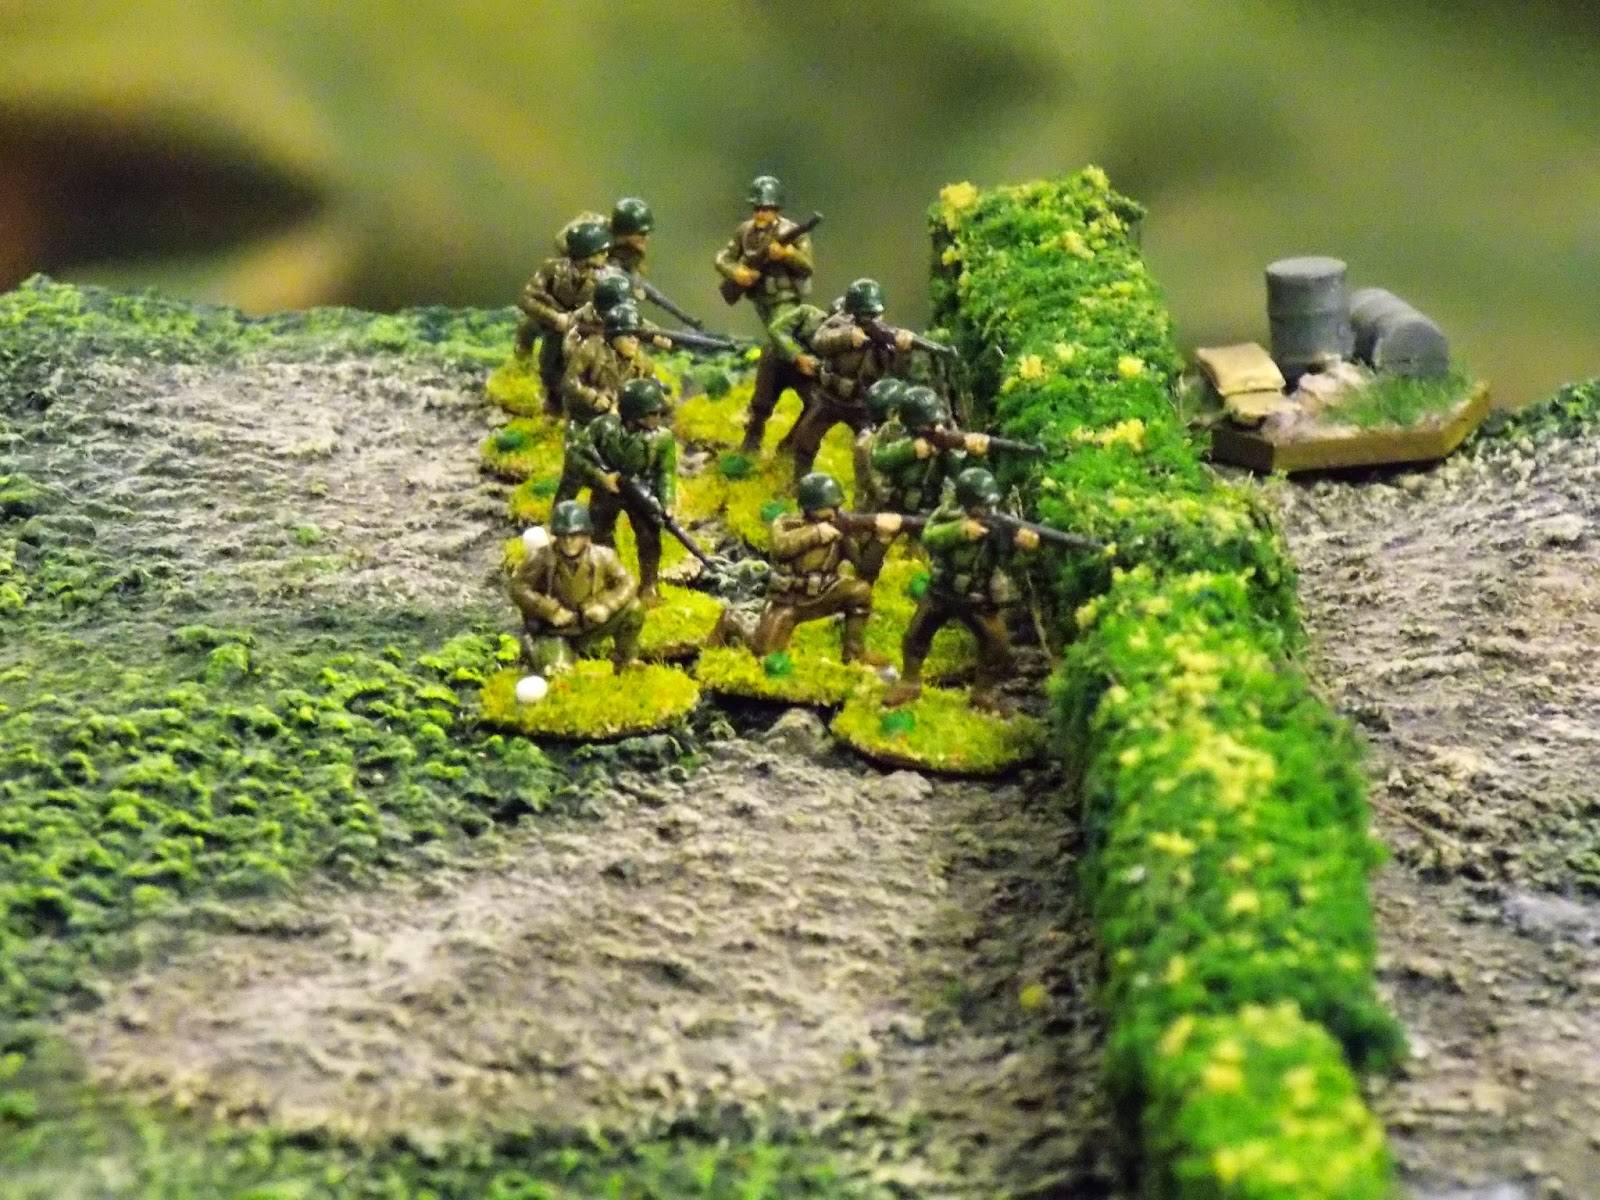
Although difficult to see, I have a LMG team with a JL and a FO on the 2nd floor. So essentially I had one team and a FO on the table while there were 3 full American infantry squads, a HMG team, a FO as well a Sherman. 

As usual when the action heated up, I forgot to take pictures. As you can see my LMG team has evacuated the barn and are fleeing back to regroup with the help of my SL. They lost 2 of their 4 men and their JL was wounded. The FO escaped unscathed, but was unable to call in the Mortars. The LMG team did chew up the US squad on their right flank so they were quite successful.

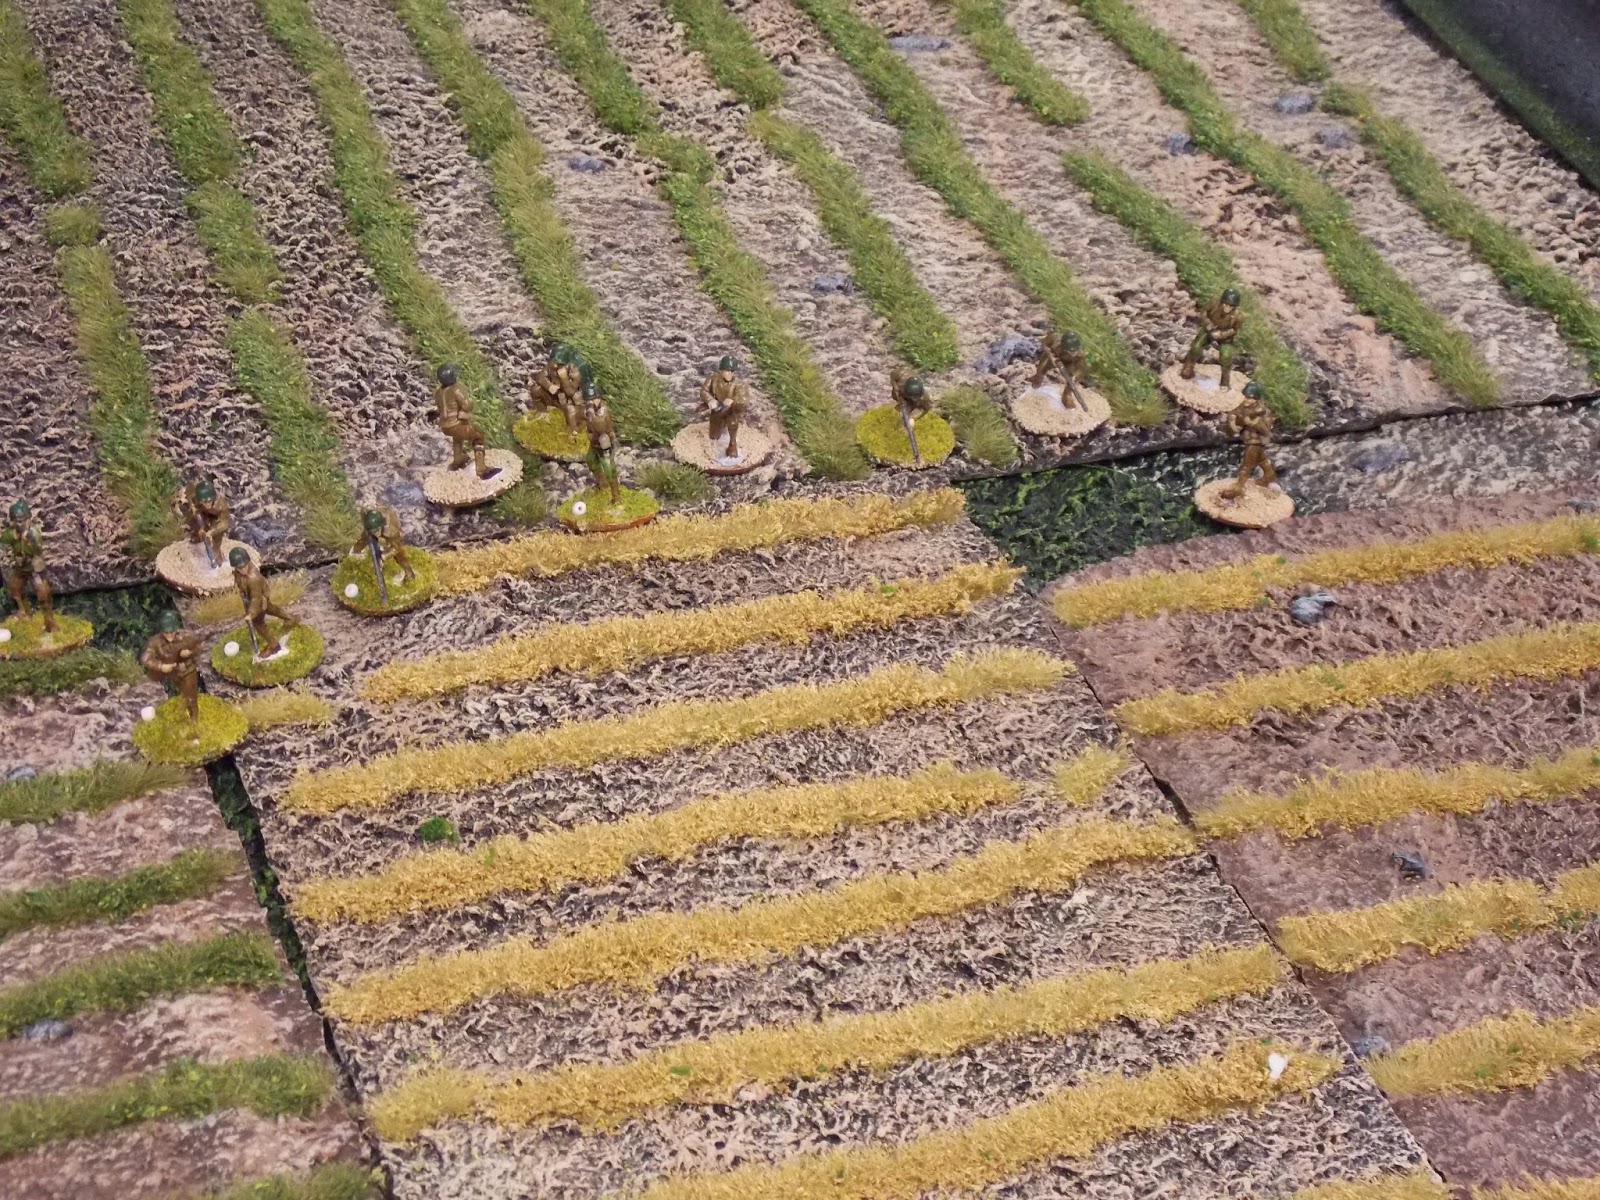
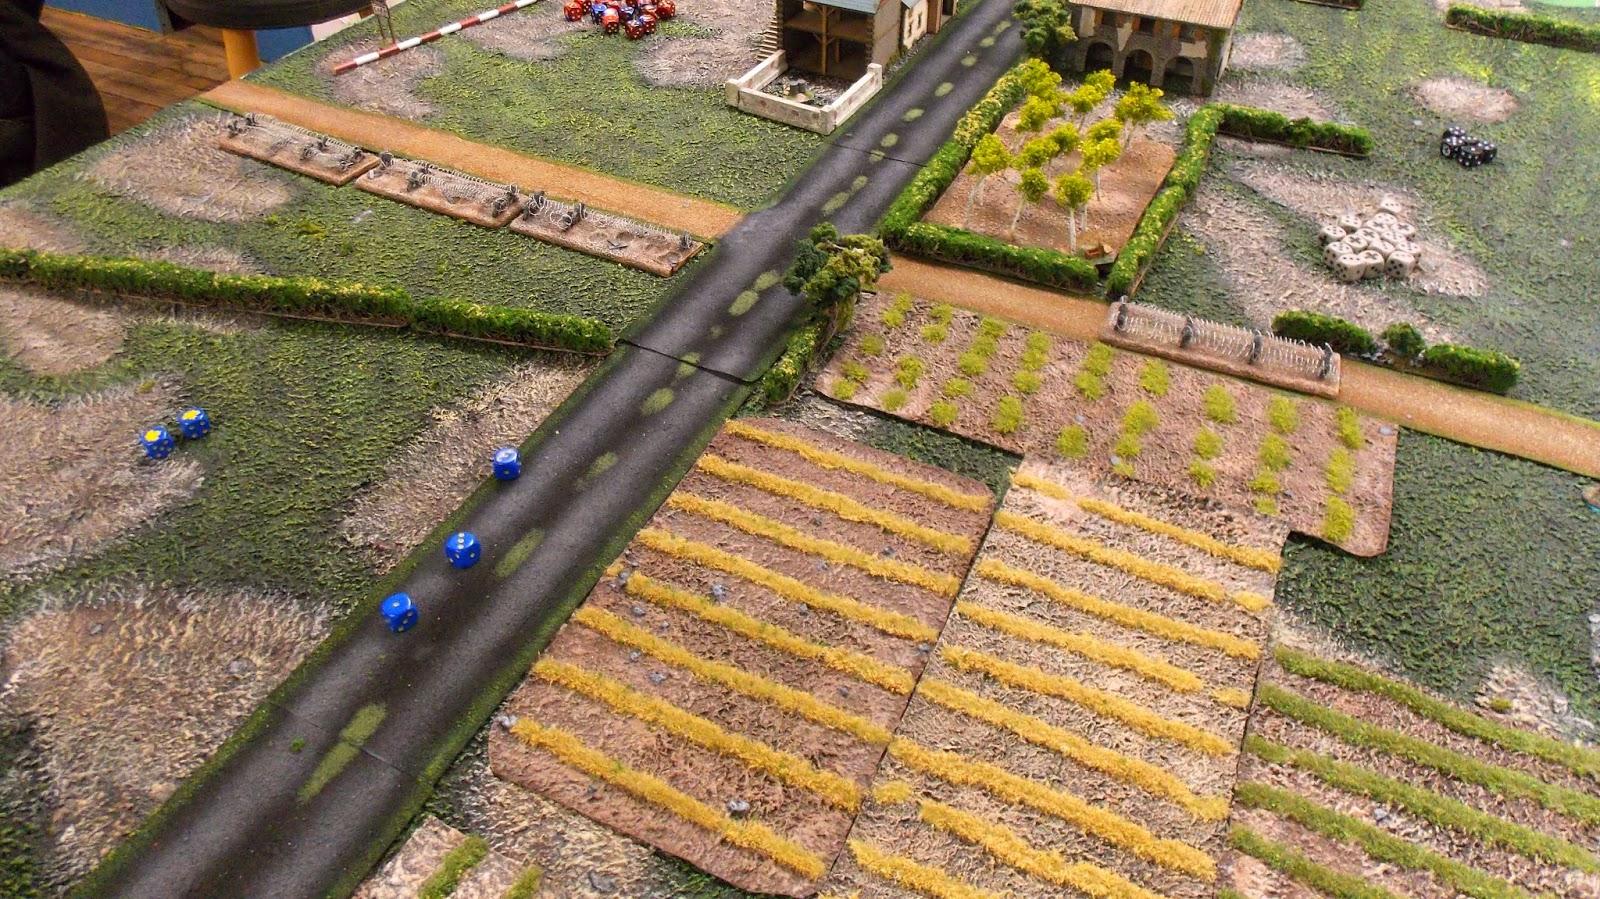
The US squad advances through the fields, I hold off deploying until they are in close range. My Panzerschreck team were able to take out the Sherman. My Morale was holding while the American Morale was plummeting.

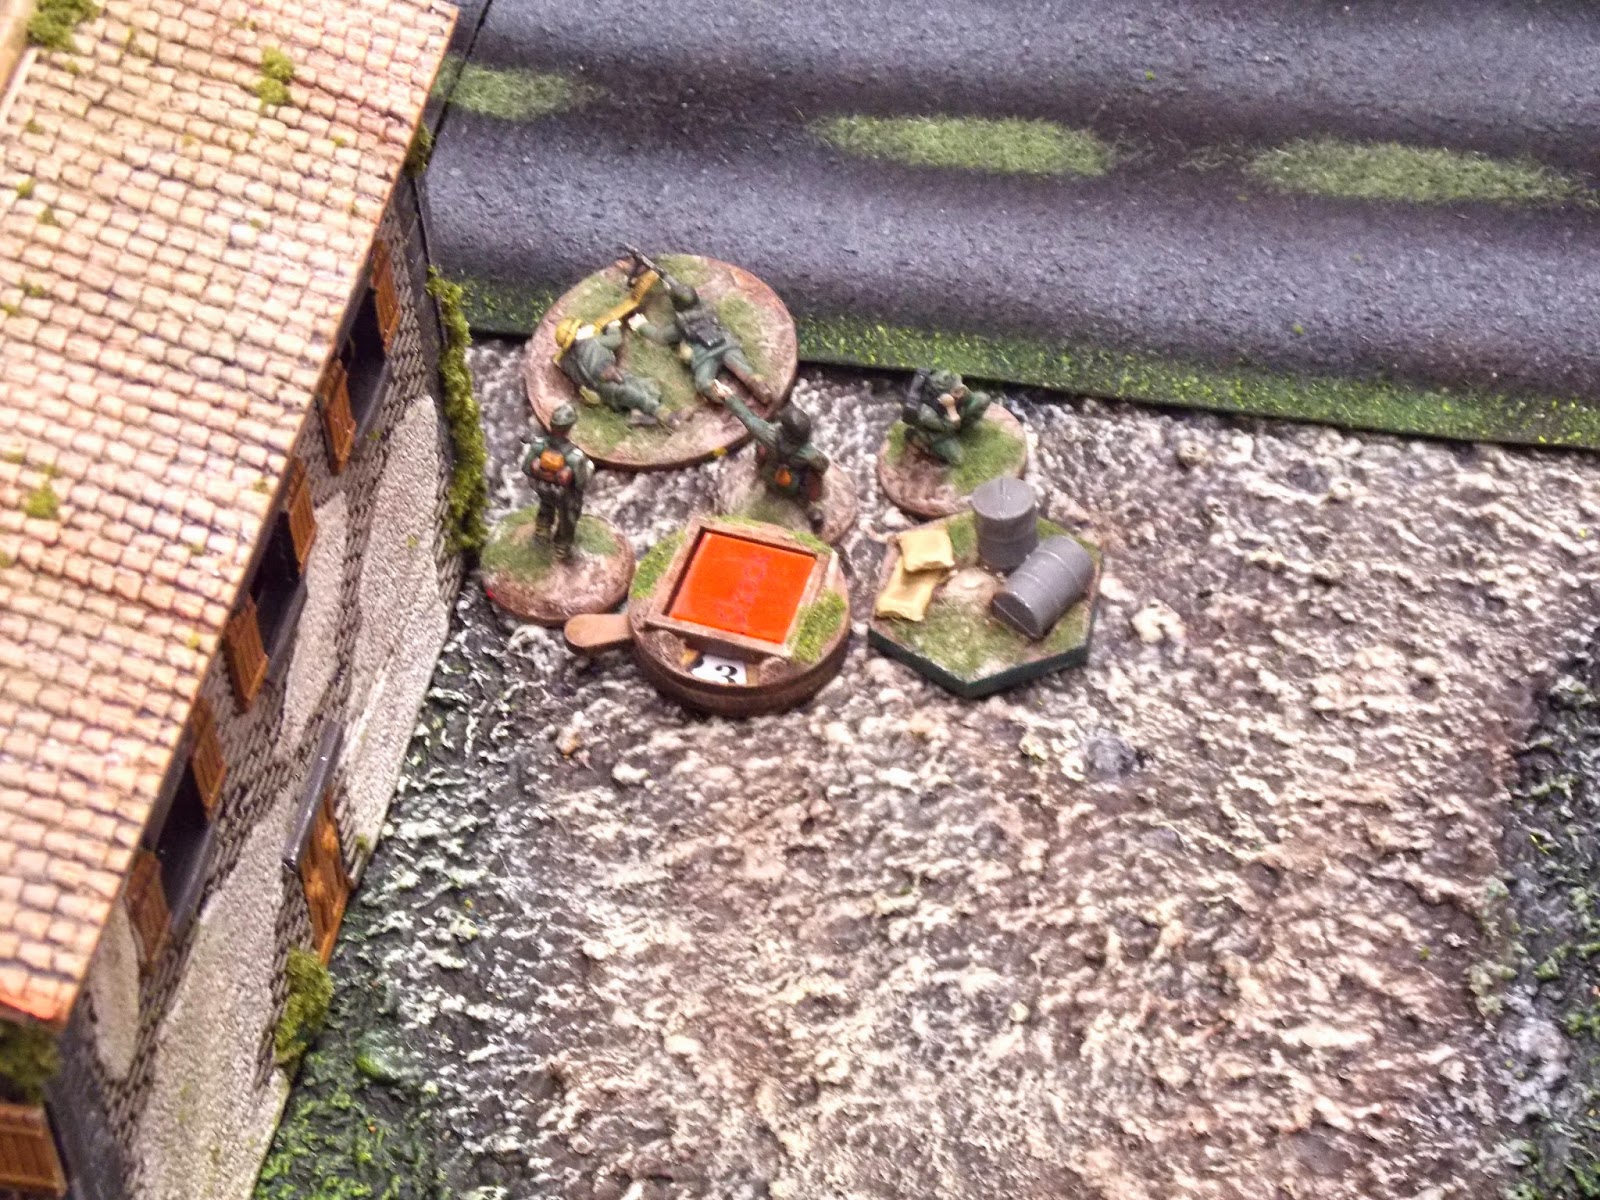
The heavily shocked LMG team, with their JL, SL and FO all shielding behind the building. The FO now has a very tight LOS up the road and is still attempting to call in some mortars.

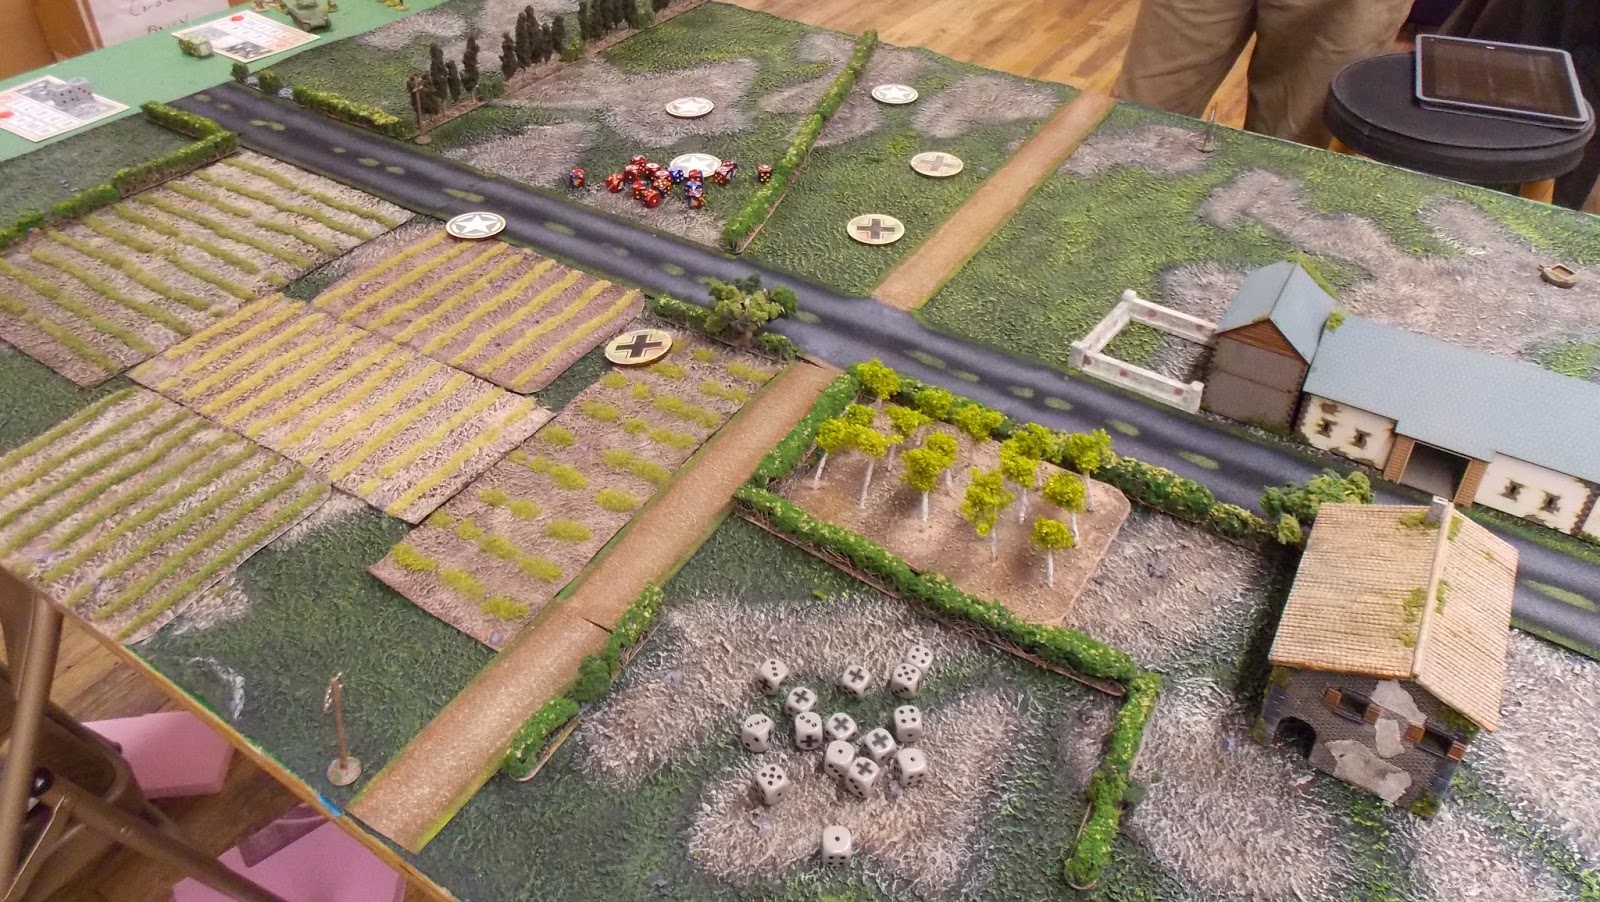
Last photo, I am afraid, by now both American and German mortars are bombarding the area. Fortunately German aiming was quite a bit more accurate then the Americans (ie I was lucky and threw a very lucky bombardment without an aiming shot). There was quite a bit more action, the American squad in the foreground is just about in close range and I dump my only full squad behind the entrenchments and send a nice 17D6 blast. I also have another squad behind the stone wall chewing up the squads on my right flank. The American's morale falls to 0 and they rout.

So Although I had a nice victory, I have lost 6 men and am starting the next game with a very depleted platoon with only 1 rifle team, and 3 LMG teams. My only plus is that I get an extra minefield, barbed wire or entrenchment aside from my 9 supports. The Americans are able to call up the cavalry and now have 25 supports, I believe it very unlikely that I will be counter attacking! I do have Colonel Goode nervous though.
I made some errors in my last post re the German's starting morale, which I have corrected here.

14 November 2014

Chronica Iohannes: Capture of Cadfael


We played our 4th game last night in our Dux campaign, the border raid scenario. The game started off very badly for me with my entry point within 12" of the Saxon entry point. The cards and the dice were initially on my side and I was able to move my fleeing noble Cadfael while destroying a unit of Saxon warriors dropping their morale to 3 in the first turn. Unfortunately then the dice failed me in movement while they favoured the Saxon's pursuit of Cadfael. About midway up the board the Saxon Lord Cuthbert with his champion was able to overwhelm the fleeing Cadfael and capture him. We unfortunately made a major error here as we misinterpreted the rules and in truth Cadfael was not overwhelmed, but so it goes. By then I had elected to withdraw and I withdrew in good order with more retreat cards then Adam had pursuit cards. Unfortunately my losses were moderate (13 men) to Adam's light losses (8 men). This of course allows him to attack in one month when I am still trying to raise troops, so I have had to not contest his next raid. He now is in a position to shower his men with loot and become a Warlord! Let the Battle for Catreath begin.

12 November 2014

Chronica Iohannes: Raid on the Village of Malton


Bit late with this post, but I needed to get it out before the 4th game of our campaign which we are having tomorrow evening. You can see an AAR of this battle on the Fencing Frog blog.

This was our best game to date, although we misinterpreted the scenario in such away that it may of cost Adam the game. The ending however was climatic and the Britons won a hard fought victory at the last moment. With the money gained in this raid, I have purchased a Watchtower which will lessen an advantage that the Saxons have had, as my troops will now arrive one turn earlier then set out in the rules.

09 November 2014

SAGA at the Hobby Bunker

Boston Trained Bands had a SAGA day at the Hobby Bunker yesterday November 9th, it was very busy as there was some sort of Cancer Charity event with Warmachine Hoards (I have no idea what this is, but it seemed very popular with at least 8 tables going). There was also 3 tables of X-Wing and a SYW game in 15 mm which looked very attractive.

We were able to squeeze out 3 SAGA players and we did have a lot interest as we were playing. The Hobby Bunker had lots of The Crescent & Cross stuff there, but no basic SAGA rulebooks which was unfortunate. I did see some purchases though of the Gripping Beast boxes of their plastic Dark Ages figures. Hopefully some interest was generated.

I had not really played SAGA for a couple of years (my gaming partner Nico disappeared about 18 months ago after the birth of his beau fils, but the good news is that he has just arisen again!). I had forgotten what a fun game it is and of course a lot has happened in two years with the publication of the Crescent and the Cross.

We played two games of the Warlord scenario, using Vikings and Anglo-Saxons warbands and had a lot of fun. The rules are easily remembered and we did not mash them too much. I took a few photos so I thought I would present them.
Saxon Levy

The Clash of Warlords scenario has one group of attacking Hearthguard being placed behind the lines of the defending warband. This caused a lot of consternation to me as I had not read through the scenario before I set up.

Anglo Saxon warriors (I know they look like Romano-Brits!)

The Viking Warlord heading off with a large unit of Hearthguard.

Where are the Hearthguard gone? The Viking Warlord is screaming to the Saxon warriors and Levy to come and get him!

Brave fellow, he has no fear.

This is the second game, this time the Viking bowman are trying to sneak up to take the Saxons from behind.

The Anglo-Saxons have a great advantage when they can form up into 10 figure units.


We made a mistake with shooting, the levy really can not be clumped up to fire.

The Anglo-saxon warlord with a unit of warriors.

The Viking Hearthguard demolish the saxon levy.............

...................but fair less well with the Saxon warriors.

Hmm what have we got here, looks like a possible mano a mano.

Indeed it is. The Viking Warlord reaches the Anglo-Saxon warlord in 3 bounds, on contact he invokes Ullr and get to re-throw all his misses to hit. The Anglo-Saxon warlord learns the danger of being unsupported and suffers two confirmed kills and dies.