
29 September 2009
19 September 2009
Wavy Flag Tutorial
I like a wavy looking flag and I just could not get the effect I wanted from rolling the flag. After looking at the Flagdude style I decided to try to micmic it. I had a bunch of GMB flags, so adaption was required.
 (6456)
I cut the flags and use a glue stick.
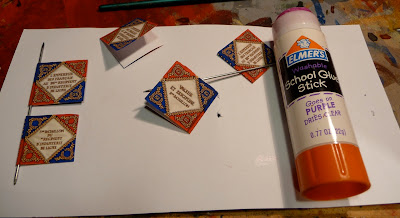
 I attach them to rigid poles temporarily.
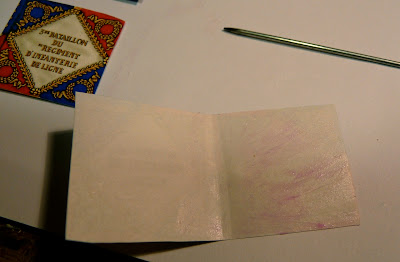
 And soak in some water for 30-60 seconds.
 The tricky bit is scrunching them up, as you can see the paint is slightly cracked in the upper flag. You have got to be careful.
 Let them dry standing up, I wait at least 12 hours.
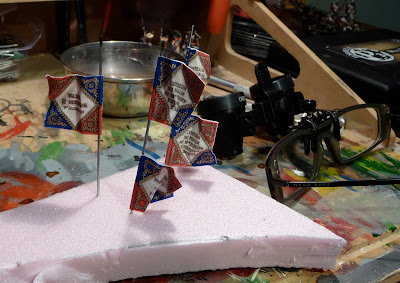 I then slide them off the wires and slide them on the already attached flag poles. Use a tiny bit of super glue to attach them.
 I then paint the edges (GW enchanted blue and blood red are good matches for GMB french flags). Attache the points (I can not find my Front Rank eagles which is pissing me off) and I think you have quite a nice effect.
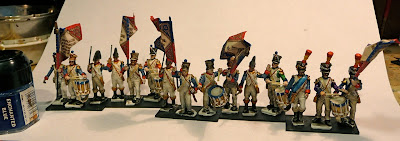
Le deuxième bataillon/82e Ligne command group
 I attach them to rigid poles temporarily.
 And soak in some water for 30-60 seconds.
 The tricky bit is scrunching them up, as you can see the paint is slightly cracked in the upper flag. You have got to be careful.
 Let them dry standing up, I wait at least 12 hours.
 I then slide them off the wires and slide them on the already attached flag poles. Use a tiny bit of super glue to attach them.
 I then paint the edges (GW enchanted blue and blood red are good matches for GMB french flags). Attache the points (I can not find my Front Rank eagles which is pissing me off) and I think you have quite a nice effect.
 (6456)
14 September 2009
Terrain Table: Roads 2
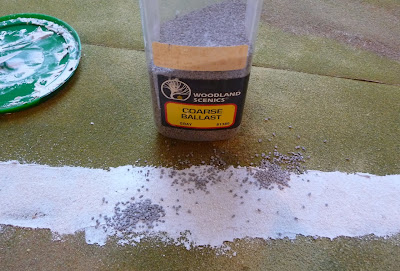
Looks a mess after the yellow oxide. I shall follow with some close ups.
 Yellow oxide.
 Buff
Buff Earth Blend turf as the final blending agent.
 Voila!!
 Blending in a bridge.
 Using a small forest as a connector for a gap in the road.
 Some buff, just to make the passage more obvious.
 I am done with terrains for a while.......
13 September 2009
Terrain Table: Enfin
It has been some time since I have posted, so I thought I needed to update the blog before we all lose interest. I have been busy working on the relentless task of painting five battalions of Victrix French, but more about that later.
I have also been working on my terrain table. I have got the oak side pieces fastened in place and now the table certainly has a finished look. Additionally, the modules are all nice and tight in place.
I have build six 2x4' pieces and five 1x4' pieces as outlined below: Brown hills, grey roads and blue rivers. The roads were quite a challenge as the pieces are not geomorphic, so there was no easy way except by trial and error to arrange the positioning of the roads. It was, in fact, quite a nightmare. I think if I was going to do it again I would have liked to have used uniform sized terrain modules, but of course that was impossible as the largest table I could fit in was 12x5'. 12x6' would have been perfect as each module could have been 3x3'. Smarter fellows (Garage-Gamer), than me have already worked this out. C'est la vie!!
 Not withstanding the above, I was able to come up with several layouts. Here was my first, it was designed for use for my FoB scenario Engagement at Ventosa.
 Do not mind the trees on the ridge, I had to find somewhere to place them.
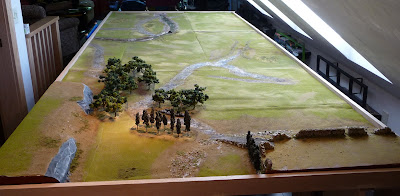
 Here is another layout, fortunately the terrain went together better than my little diagrammes. You will notice that the stretch of road going from the bend in the river in module C is missing, I can't get everything done (but I am working on it)!!

 Forest used to link gap in road.

This layout went together pretty well.
 Not withstanding the above, I was able to come up with several layouts. Here was my first, it was designed for use for my FoB scenario Engagement at Ventosa.
 Do not mind the trees on the ridge, I had to find somewhere to place them.
 Here is another layout, fortunately the terrain went together better than my little diagrammes. You will notice that the stretch of road going from the bend in the river in module C is missing, I can't get everything done (but I am working on it)!!
 Forest used to link gap in road.
This layout went together pretty well.

Overall, I am quite pleased with the table and the modules. There are quite a few possibilities for different scenario setups.
Time to get back to those Victrix French infantrymen......
(5834)
Terrain Table: Roads 1
I constructed my roads my using drywall compound as the base with fine sand and little stones as the relief. I then paint the road heavily with Burnt Umber, and then progressive dry brushes of Yellow Oxide and Buff. I then blend the road into the terrain using Earth Blend fine turf (Woodland Scenics®).

 More photos to come.....


 More photos to come.....
Subscribe to:
Posts (Atom)