Showing posts with label Saipan. Show all posts

24 January 2022

Saipan-The O-1 Line (9)


We played the last game in our Saipan Campaign last week, I had already game mastered a Gung Ho game earlier in the day so I was a little tired but at the same time I was in a gaming mood so I put some planning into this game which I will discuss below.

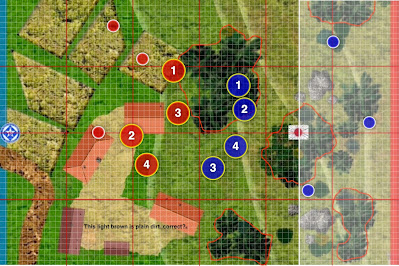
I finally felt I did OK with this Patrol Phase, I generally feel comfortable with the movement of my Patrol Markers but screw up the placement of the JOP's. I felt in this game I finally got my JOPs in the right spot.


USMC (FM 11)
6th Marine Regiment

Type F USMC Platoon #2 (less 2 men)

2SL
3 Infantry Squads with Sup JL and 12 men

Supports (11+1)

2 Flamethrower Teams (6)
FO (5)
SMG's for 1 squad (1)

Japanese (FM 11)
136th Infantry Regiment

Type B Infantry Platoon #2 

2 SL
3 Infantry Sections with Jl and 12 men
Grenadier Section with JL and 12 men and 3 50mm Mortars

Bunker

Supports (7)

20mm AA Cannon (4)
3 Entrenchments (3)


So on to the game:

We were down to the last game in this campaign, the situation being that the Victory Conditions are that the USMC player must control table 6 on turn 8 to claim a Major Victory or Turn 9 for a Minor Victory. Anything else is a Japanese Victory. We are at Table 9; so at the most, it was going to be a minor victory for the marines. 

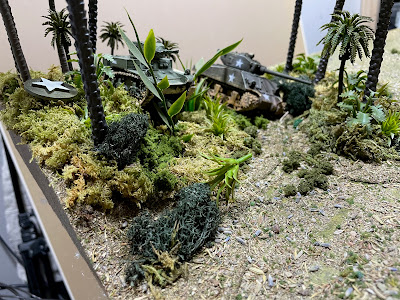
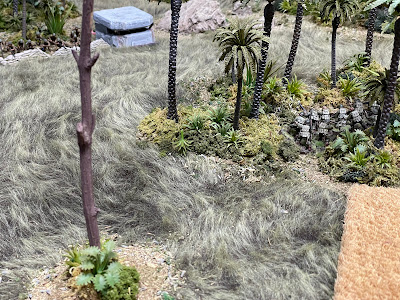
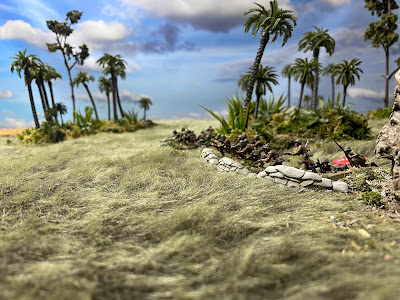
When I looked at the table, I was relieved that I was not the attacker. Essentially the marines have to climb a hill which is graded as broken ground with abrupt contours in height at 4 points causing them to lose 1 pip per d6. The actual hill gives soft cover only when not moving. Additionally vehicles can not ascend the hill. I appreciated that IG's and AFV could have LOS but they would be at a distance and I could easily move out of LOS as needed. I felt that P-Y would be unlikely to take this type of support on this table. I was a little intimidated however as the game went on that he had taken two Flamethrower Teams!

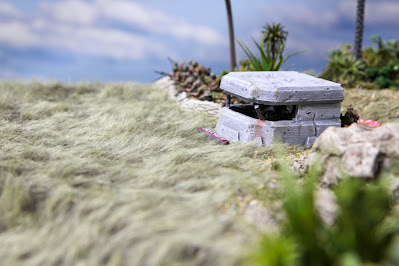
My plan as you can see from my supports was to place the 20mm cannon in the Bunker which the scenario gave me for free and only place my infantry squads in bunkers. Because the Japanese had time to prepare for this assault, the scenario allowed them a 9" deployment rather than 6". I would use my 4th squad as a support when one squad became close to breaking with the plan to pull them back and redeploy the fresh squad. One entrenchment would go in the centre jungle, with one on my left flank between a rock and the aforementioned central jungle. I would place the Bunker on my right flank angled towards the centre with the last entrenchment on my extreme right. This gave me complete LOS of the American position. The jungle in the centre of the terrain was their most likely cover for their advance so I would have at least 3 firing positions in hard cover at close range with which to rain fire!

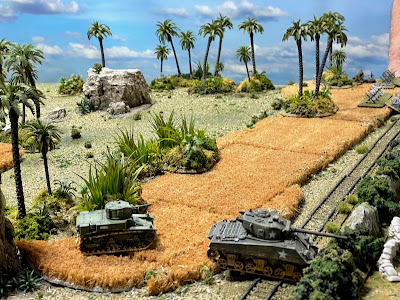
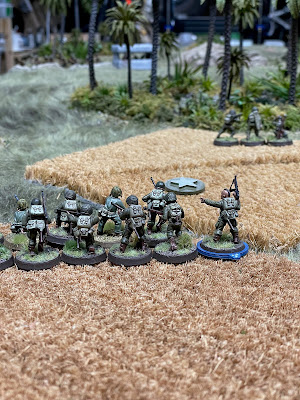
Marines to the left and IJA to the right.
The Marine approach, hard to see but the terrain has been elevated, the  contour changes are the dark grass
Close of the IJA edge from their left flank
Mostly hard cover
Close up of the Marines right flank 

I will let the  photos from the camera of P-Y tell the story.............
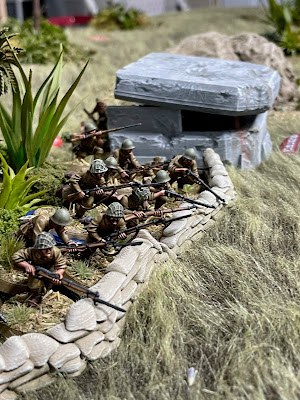
LMG Squad 1 on my left flank at the ready.

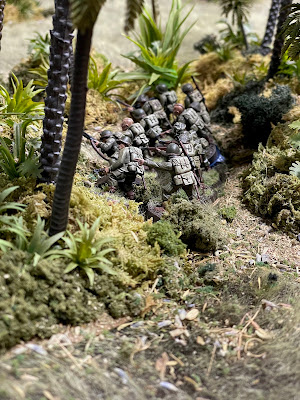
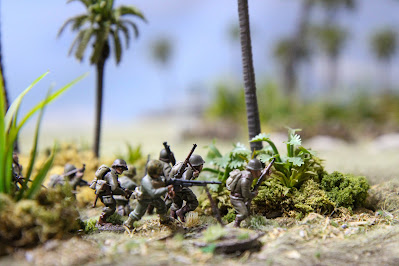
The marine's advance is rapid as squad 1 goes into the central jungle.

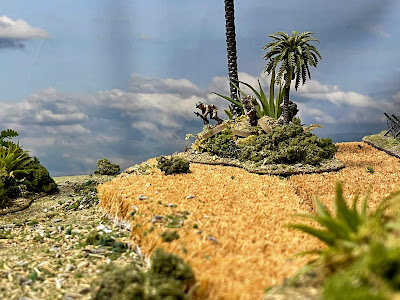
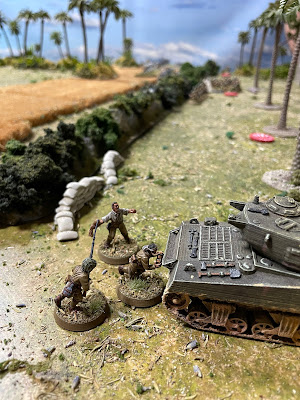
Hopefully a daunting prospect!

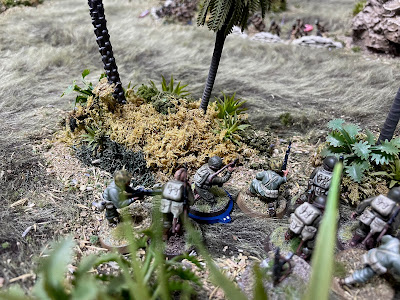
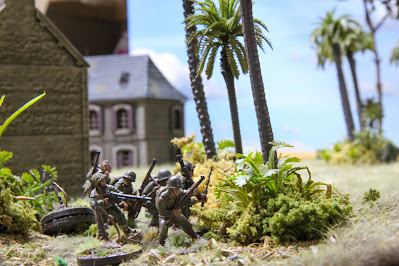
Squad 2 with a Flamethrower team in front adding to offer support

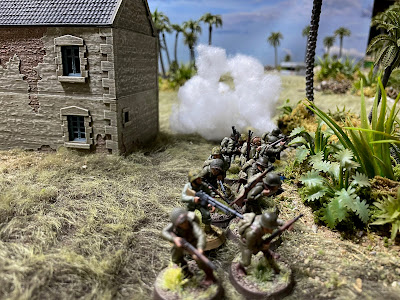
Marine squad 3 starts in hard cover in one of the stone houses but Japanese smoke mortars block their LOS so they exit and advance up their right flank.

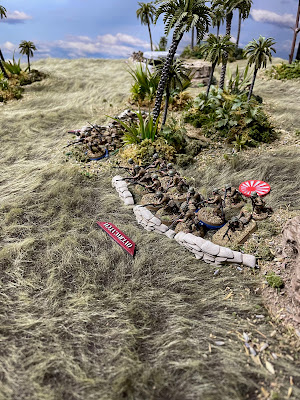
Prepared to meet the oncoming marines, with the Knee Mortars in the jungle and the LMG squad 2 in the entrenchment.

The marines take some fire, but with their Superior JL's can remove shock fairly quickly.

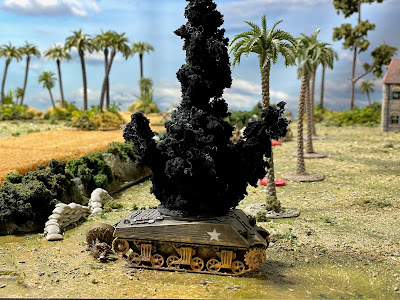
......and they retaliate on IJA # 2 who are taking casualties. 

I hav enot done a good job on positioning my Knee Mortars and my right flank is also starting to weaken. The marines in the central jungle have caused IJA #1 to break and I have to bring in LMG squad #3 into the entrenchment on my extreme right flank.....

....I swing the Knee Mortars through the jungle to support my right flank.

Now the 2nd marine Flamethrower team has arrived and they swing to their right flank to support marine squad #3, This is starting to get tricky.

I am ready though I my right flank with 3 units now in firing position....

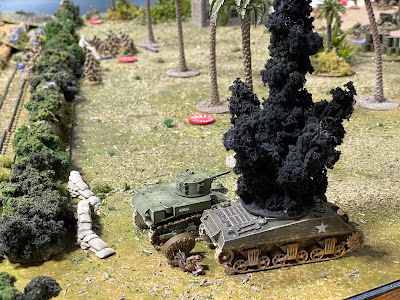
Marine squad #1 starts to weaken and they can not get the Flamethrowers in position to support and squad #3 is still far back. A marine SL takes a hit, the marine FM is falling. They tried to make a lateral move to their left they get caught in heavy crossfire, they break and rout off the table as the main fire is conming from their flank.....
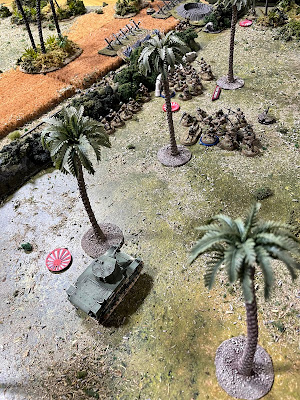
Marine squad #3 on the US right flank takes more hits and a JL is wounded, marine FM drops to less than 3. A Japanese Major Victory in the campaign!

Summing Up

This was really a great campaign, with the Wild Card we got in 10 games. I believe 8 were Virtual and 2 In-Person. First, I have to thank P-Y for putting a lot of work in on the terrain and hosting all the games. The terrain was terrific as many of you have pointed out on FB. 

P-Y is a challenging opponent and if I have it right he won the majority of the games in this campaign, but the clock ran out for him. I think this was going to be a very hard table to take and I was lucky enough to have an intact platoon. In this game the dice gods did favour me, so the IJA won the campaign.

In respect, to the campaign itself I can highly recommend it. It was a lot of fun and was well balanced, so thanks to Stephen Philip who put it together. The terrain at times was a little difficult to sort out, as there were a lot of different types. I had not realised it to the last game, that the terrain maps included are images from the TableTop version of the game. What was jungle and what was not, was a little hard to sort out at times and I might recommend that for posterity I would use different scenario images, but of course scenario maps are guidelines and not rules, so I should not quibble! 

Well I am not sure what is next, I suspect we might be taking a break from CoC campaigning for a bit and certainly the jungle for a good while. I know from the Gung Ho campaign I am hosting, that moving figures though jungle terrain is a lot of work. I am, however, working on a project which will have even more challenging terrain in which to play CoC than even the jungle.

16 January 2022

Saipan-Coconut Grove (8)

This Thursday,  myself and Pierre-Yves got together to play the next turn in the Saipan campaign, we were back to Virtual and Eero in Finland joined us. This will be the first go at table 5, with one table left to go. If the Japanese win this time they confirm a Minor Japanese Victory in the Campaign. This was the "Attack and Defend" scenario from the main rulebook. I believe that P-Y only had one free move and I ended up being the attacker. The Patrol Phase went OK for me but I did a real poor job of placing my JOP's as you will see.


USMC (FM 11)
6th Marine Regiment

Type F USMC Platoon #2

2SL
3 Infantry Squads with Sup JL and 12 men

Supports (9)

M3A1 Satan (8)
?

Japanese (FM 11)
136th Infantry Regiment

Type B Infantry Platoon #1 (13 men missing)

2 SL
3 Infantry Sections with Jl and 12 men
Grenadier Section with JL and 12 men and 3 50mm Mortars

Supports (6)

Tank Hunter Team
2 Entrenchments
2 Minefields


So on to the game:

Once I saw that P-Y was going to bring on a fresh platoon for this game, I decided to play the game with Platoon #1 which was down 13 men and reserve Platoon #2 for the next and what would be the final game in the campaign. There was still another table and the USMC would have to win both to forestall a Major Japanese Victory. I think this was a good plan as playing a kamikaze game with Platoon #1 might result in several USMC casualties in the USMC Platoon #2 with little cost to myself. I would then be set up on table 6. Unfortunately, I messed things up by placing my JOP's too close to the USMC positions and was overrun rather quickly. well on to the action.......

....with some terrific photos from the camera of P-Y. 

The USMC moves
Table view from the souther edge, as usual P-Y's terrain was terrific 
The marines deploy and advance quickly with 2 of their squads, one in the centre of  position and one to their right flank......
.....and as usual they have a tank, and this time a Satan Flame Tank which they rapidly advance up the centre. It is now looking tough and the IJA have yet to deploy. I decided to get at least 1 CoC dice so I could ambush that tank before I put any men down.
I realised now that this JOP was a waste of time as I deployed it too far forward thus allowing the marines to deny it to be quite early in the game, still holding off deploying any troops. the satan has a reach of 36" which covers most of the table with 16d6 strike dice!
JOP captured as expected, a bog would of been nice, P-Y rolled a 2 and  1 on his movement dice!
He rapidly brings up a 2nd squad.
and before I know it they are over the hedge.....
....and advancing across the road.
P-Y now drops his 3rd squad in the field.

But where are the Japanese?

Well I finally have some targets, so I plop my Knee Mortar squad in an entrenchment in front of the minefield while placing my 1st squad in another entrenchment in the jungle on the northeast edge of the table, that sound foolish you say but I have a double phase and the Satan is not on Overwatch so........
......I order the Knee Mortars to fire a smoke blocking off the LOS of the Satan first.
P-Y ends the turn removing all the smoke, but does not have the dice to shoot at flames, so in my next phase, which luckily is a double phase, I launch an ambush with my Tank Hunters, place a SL within in range and throw my next CD. I am able to activate the Tank Hunters but they fail to make it to the flank of the Satan and the Satchel has to be placed on the front of the tank. Six d6 to 4d6, I have 2 hits but P-Y has 2 saves. I am able to place a shock only and that is it for the Satchel charges. 
One of the Tank Hunters throws a smoke grenade and the satchel man is able to escape.
In the interim, I am able to fire at the marine 3rd squad causing some damage with the Knee Mortars and the LMG squad in the jungle.

I place another squad in the open near the tank, getting real kamikaze now. I was able to drive the marine squad 2 off the hedge but the tank hunters take a shot from the Satan and break interpenetrating the LMG squad.........
......I make a feeble attempt to fire another smoke round but fall short . The Satan starts to advance as does the marine squad #2.
It was obvious now that I was not going to cause the casualties I had hoped for, so I withdrew. A USMC Victory on to Table 6 for our ninth and final game.

Butcher's Bill

Well only 4 men were lost on each side but with the FM deduction the USMC were 1 dead and 1 missing with IJA  2 dead and 1 missing.


USMC

Final FM 11

2 down for next game (platoon 2)
4 down for next game (platoon 1)

CO +3 (+1 support)
MO +9 (+3 on FM roll, Platoon Leader 12" CR with 4 CI)
Platoon Leaders Outlook Thoughtful

IJA

Final FM 9

0 dead for next game (platoon 2)
14 dead for next game (platoon 1)

CO 0
MO +4 (+1 FM)
Platoon Leaders Outlook Merry

17 December 2021

Saipan-Sugar Rush (7)


Last night myself and Pierre-Yves got together in person to play the next turn in the Saipan campaign. This will be the third attempt of the marines to take this table and now they have 15 supports while the Japanese will continue to have only 7. 
Pretty similar to the last game, the marines had fewer free moves so they were a little further back on the table. I would of liked to get my southern JOP a little more south but it was OK.

USMC (FM 9) (+3 on FM roll)
6th Marine Regiment

Type F USMC Platoon #1 (7 men missing)

2SL
3 Infantry Squads with Sup JL and 12 men

Supports (15)

M4A2 Sherman (7)
M3A1 Satan (8)

Japanese (FM 11) (+3 on FM roll)
136th Infantry Regiment

Type B Infantry Platoon #1 (15 men missing)

2 SL
3 Infantry Sections with Jl and 12 men
Grenadier Section with JL and 12 men and 3 50mm Mortars

Minefield added as per consolidation

Supports (7)

Tank Hunter Team (2)
Flamethrower Team (5)

So on to the game:

I felt that I had little chance of winning this table one more time as the Marines had more supports and had already burst one hole through the hedge. I took an extra minefield but decided to not block the hole as I felt the Marines would just go to the south with a tank anyway but maybe tempted to get their infantry through the breech and I wanted to channel them. What became immediately obvious was this was not going to be the case as P-Y had used all supports on 2 tanks, with one being a Satan Flame Tank!

I suspected I could take out one tank with my tank hunters but really had no way to stop the second tank...........or as I thought. This resulted in me immediately changing my plan (if I actually had one). I knew I had little chance of winning now, so I decided to try to rush one of the marine JOP's. This was going to be close to impossible but I said why not. I deployed my Flame thrower team west of the hedge with the plan to go down the northern edge to try to distract the marine tank advance. P-Y rapidly advanced his 2 tanks to the hedge and then pointed out to me that he could not understand why I had deployed my Flamethrowers as they could be effective against tanks........well I completely had missed that!

Now I was in real trouble, I deployed all my squads now in a futile attempt to drive back the Satan with LMG fire, after all they only had 4 armour. The Sherman had burst through the hedge by now and as expected (I was lucky to accumulate CoC die quickly), I ambushed it with my tank hunters, 4 net hits, P-Y rolled a 6, the marines were down 2 FM. But what to do with the Satan, my Flamethrowers were a long way off, it was my phase and I decided to withdraw. P-Y decided to interrupt with the Satan to crush 2 of my infantry squads that were in range. Nine hits but only 2 kill, unfortunately one was on a JL, so I dropped 1 FM but then withdrew safely. I had no loses as the FM difference took out the one killed man.

Well we are now on to table 5, and our next turn is number 7, so I am in pretty good shape. I have a completely intact squad. If I have it right, I just have to win one more turn to win the campaign.


Butcher's Bill

The post game calculations were quite easy as no men in the core platoons were lost on either side.

USMC

Final FM 7

5 down for next game (platoon 1)

CO +2
MO +7 (+2 on FM roll, Platoon Leader 12" CR)
Platoon Leaders Outlook Thoughtful

IJA

Final FM 10

0 dead for next game (platoon 2)
14 dead for next game (platoon 1)

CO +1
MO +3
Platoon Leaders Outlook Assured (+1 FM)

On to some terrific photos from the camera of P-Y....
Tanks deploy
Worst deployment in history
That looks nasty
Thes guys are even more nasty
But up comes the Satan
Cowering in fear